

Privacy isn’t optional anymore. With data breaches and surveillance on the rise, more users are choosing to run a home VPN server—a private setup that encrypts your traffic and gives you secure access to your home network from anywhere in the world.
Recent research shows that over one-third of global internet users now use a VPN, with adoption increasing sharply among those working remotely. As home networks carry more sensitive data, setting up your own VPN has become not just possible—but practical. This guide will walk you through what it is, how to build one, and what to consider before getting started.
What Is a Home VPN Server?
A home VPN server is a private server that you set up on your own network to securely route internet traffic through your home internet connection. Unlike using a third-party VPN service, this setup gives you full control. You decide which devices connect, what encryption is used, and how access is managed.
Here’s how it works in simple terms: when you’re away from home and connect to your home VPN, your device acts like it’s sitting right inside your home network. This means you can securely access your files, smart devices, or even stream geo-restricted content just as if you were at home.
Let’s break this down even further:
- VPN Tunnel to Home Network: When you connect remotely, you establish a VPN tunnel that makes your connection appear as if it’s coming from within your home network. This can be advantageous if you want to access files stored on a home server or, for businesses, access proprietary applications and services that are restricted to the internal network.
- Encryption: The VPN server encrypts all the traffic between your device and the server, making it impossible for outsiders to intercept or read your data. This is particularly important for businesses, ensuring that employee communications and business transactions are secure from potential hackers.
- IP Masking: When connected to the home VPN, your IP address will appear as your home’s IP rather than your actual remote location. This can also help in bypassing geo-restrictions on certain services.
Unlike commercial VPNs, which route your traffic through servers worldwide, a home VPN server keeps all traffic within your control, adding an extra layer of privacy. It’s a great option for businesses that want to securely connect to their office or home network without relying on third-party services.
Benefits of Running a Home VPN Server
Setting up a home VPN server isn’t just for IT professionals. More people, including remote workers, small business owners, and even gamers, are turning to home-based solutions. But why?
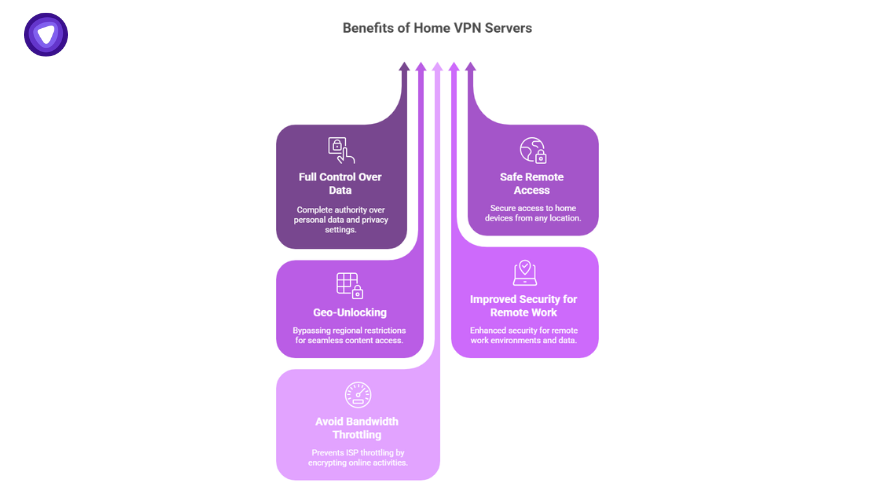
1. Full Control Over Your Privacy and Data
When you use a commercial VPN, your data passes through their servers. While reputable providers follow no-log policies, you’re still depending on a third party. Hosting your VPN server at home removes that dependency. You control what gets logged—if anything at all.
Plus, with rising concerns about surveillance, ISP tracking, and third-party data harvesting, many users now prefer to create a VPN server at home that keeps them off the grid—literally and legally.
2. Safe Remote Access to Your Network
A home network VPN server lets you access your home devices from anywhere in the world. This includes NAS drives, desktop files, smart home systems, or IP cameras. Whether you’re traveling or working from a coffee shop, this gives you secure tunnel access without needing to expose ports to the public internet.
3. Geo-Unlocking and Location Spoofing
Let’s say you’re traveling abroad but want to stream your home country’s services or access work files as if you’re back home. When connected to your VPN server for home, the internet sees your traffic as coming from your home IP—perfect for bypassing region blocks without using a third-party provider.
4. Improved Security for Remote Work
With hybrid work now the norm, securing remote access is critical. Home VPNs encrypt your connection to your personal or work devices, reducing risks of interception over public Wi-Fi.
Nearly 40% of VPN users today rely on VPNs for work-related tasks, showing how essential they’ve become for data security in home-based offices.
5. Avoid Bandwidth Throttling
Some ISPs slow down specific types of traffic like video streaming or P2P sharing. Running a VPN on a home server hides your activity, reducing the likelihood of throttling. Your ISP only sees encrypted packets—not what you’re doing online.
Comparing Home VPN Servers vs. Commercial VPN Services
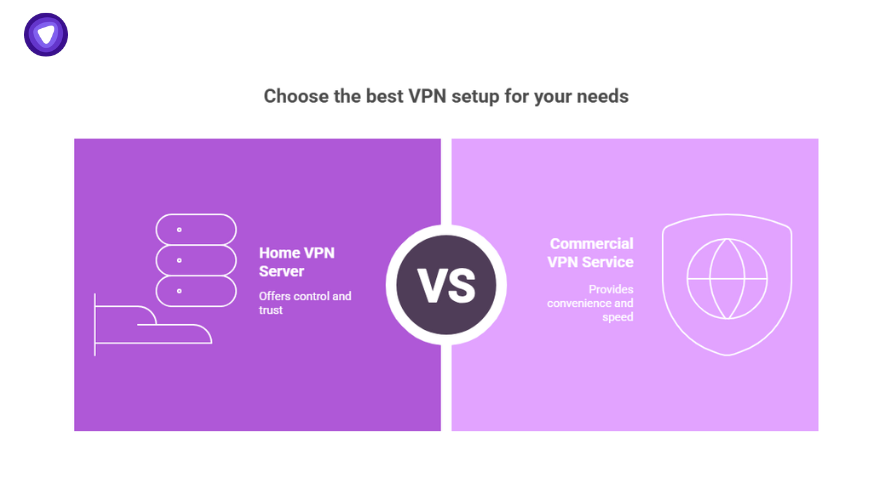
Choosing between setting up your own home VPN server or subscribing to a commercial VPN service comes down to what you need—control or convenience. Let’s break it down in plain terms.
Control vs. Convenience
When you create your own VPN server (free or paid) at home, you’re in full control. You choose the hardware, protocols, logging behavior, and who gets access. That’s great for tech-savvy users who value customization and trust only their own setup.
But managing and maintaining a home server VPN also means taking care of software updates, uptime, port forwarding, and security patches. If something breaks, you’re the support team.
On the flip side, commercial VPN services offer plug-and-play simplicity. You pay a subscription fee, install the app, and you’re up and running in minutes. No manual configuration, no firewall fiddling, and no dynamic DNS setup.
Performance and Speed
Self-hosting a VPN server at home depends on your ISP’s upload speed and your hardware. For example, a home VPN server Raspberry Pi setup may work for casual browsing but struggle under heavy load. On the other hand, commercial VPNs have massive infrastructures with high-speed global servers.
However, some users find that local traffic routing (e.g., connecting to home NAS or printers through a home VPN router) is faster and more efficient when managed locally.
Privacy and Trust
Running your own VPN server for home means you never send traffic through a third-party server, increasing trust and transparency. But it also means taking responsibility for encryption, DNS leaks, and access logs.
Commercial VPNs simplify privacy management with features like kill switches and built-in leak protection—but again, you’re trusting them with your traffic.
Here’s a quick comparison table:
| Feature | Home VPN Server | Commercial VPN Service |
| Setup Complexity | High (Manual setup required) | Low (App-based setup) |
| Monthly Cost | Free or minimal | Subscription-based |
| Control | Full | Limited |
| Maintenance | Self-managed | Provider-managed |
| Speed (Upload Dependent) | Varies by home ISP | Generally fast (multi-location) |
| Device Accessibility | Access to local home devices | Not available |
| Logging Policy | You decide | Must trust provider |
Cost of Setting Up a Home VPN Server
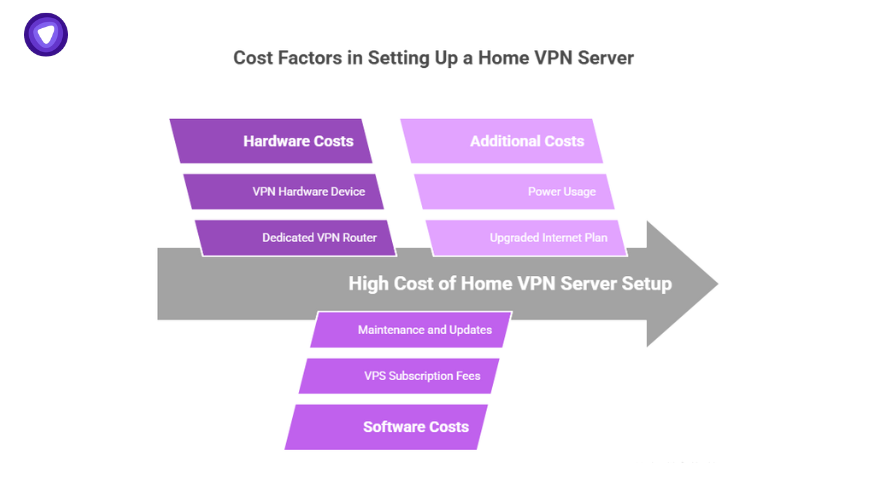
One of the biggest factors to consider when setting up a home VPN server is the cost. Unlike subscribing to a commercial VPN service, which usually has a set monthly or yearly fee, setting up your server has various costs depending on the setup method you choose.
1. Hardware Costs
The most significant cost in setting up a home VPN server is the hardware. Here are some options:
- Dedicated VPN Router: A router that supports VPN functionality out of the box can cost anywhere between $100 and $300, depending on the model and its capabilities. Some routers are designed specifically for VPN use and offer better performance than standard routers. For example, Asus and Netgear make popular models that come with built-in VPN capabilities.
- VPN Hardware Device: If you want a more professional setup, you might consider buying a VPN hardware device specifically designed for handling VPN connections. These devices can cost more but provide better performance and scalability.
- Using an Old Computer or Raspberry Pi: If you’re looking for a DIY cheap VPN solution, you could repurpose an old computer or even a Raspberry Pi to act as your hardware VPN. This can significantly cut costs since you’re using hardware you already own.
2. Software Costs
While most VPN server software, such as OpenVPN or WireGuard, is open-source and free, there can be hidden costs in maintaining and updating it. Additionally, if you opt for a virtual private server (VPS) or cloud computing service, there will be subscription fees for hosting the server remotely. VPS services like DigitalOcean or Amazon Lightsail typically charge $5 to $10 per month for a basic server, which can quickly add up over time.
3. Additional Costs
- Power Usage: Running a home VPN server 24/7 can slightly increase your electricity bill. While it won’t be a massive increase, it’s still worth factoring into your overall costs.
- Upgraded Internet Plan: Depending on how many people are connecting to your VPN and the amount of data being transferred, you might need to upgrade your home internet plan to ensure better speeds. Many ISPs offer different tiers of service, and business plans often come with higher costs but offer better upload speeds and reliability, which are crucial for a VPN.
Step-by-Step Setup Methods for a Home VPN Server
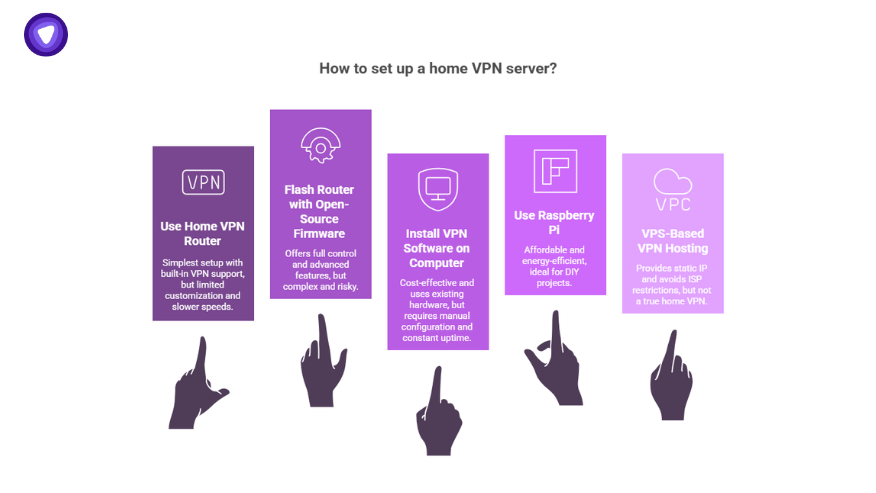
There’s no one-size-fits-all when it comes to building a home VPN server. You’ve got options, depending on how hands-on you want to be, what devices you own, and how much performance you expect. Below are the most common setup paths.
1. Use a Home VPN Router with Built-in VPN Support
This is the simplest route for most users. Some routers come preloaded with VPN server for home capabilities. These include models from ASUS, Netgear, and others with built-in OpenVPN or WireGuard support.
How it works:
- Log in to your router admin panel.
- Enable the VPN server function.
- Generate VPN config files and distribute them to devices.
- Use your public IP or dynamic DNS (DDNS) to connect remotely.
Pros:
- Easy to manage once set up.
- No extra hardware needed.
- Works well with home network VPN server needs like remote access to smart devices or file servers.
Cons:
- Limited CPU means slower encryption speeds.
- Firmware may restrict customization.
2. Flash a Router with Open-Source Firmware (Advanced)
Some routers can be “flashed” with third-party firmware like DD-WRT, OpenWRT, or Tomato. These let you create a VPN for home with more flexible settings and protocols.
Setup Steps:
- Flash the router (carefully—mistakes can brick it).
- Install VPN server software like OpenVPN or WireGuard.
- Configure users and certificates.
- Use port forwarding and dynamic DNS to enable external access.
Pros:
- Full control over configuration.
- Better support for advanced VPN features.
Cons:
- Complex setup process.
- Not all routers support flashing.
- Mistakes during flashing can permanently damage your router.
3. Install VPN Software on a Computer (Windows/Linux/Mac)
If you want to create a VPN server at home without buying extra gear, turn your PC or laptop into a server. Open-source software like OpenVPN or SoftEther makes it possible.
How to do it:
- Download and install the software.
- Generate server and client certificates.
- Configure router port forwarding.
- Use a DDNS service to maintain accessibility.
Best for: Users who keep a desktop running 24/7 or want a free home VPN server without new purchases.
Drawbacks:
- Requires manual configuration.
- You must keep the host device always on.
- Less secure unless properly hardened.
4. Use a Raspberry Pi as a VPN Server
A Raspberry Pi is low-cost and energy-efficient—perfect for DIY projects. You can create your own VPN server (free) using OpenVPN, PiVPN, or WireGuard.
Steps:
- Flash Raspberry Pi OS.
- Install PiVPN (a command-line tool).
- Choose a protocol (OpenVPN/WireGuard).
- Set up port forwarding and DDNS.
Why it works well:
- Affordable.
- Low power consumption.
- Small form factor.
It’s a great option if you want a secure VPN on home server that doesn’t tie up your main devices.
5. VPS-Based VPN Hosting (Not Exactly “Home,” but Popular)
Some users set up a VPN server on a Virtual Private Server (VPS) instead of their own network. Technically, this isn’t a home VPN server, but it provides similar privacy benefits with cloud flexibility.
When to use it:
- You need a static IP.
- You want to avoid ISP throttling or restrictions.
- You don’t want to expose your home IP.
Troubleshooting Common Home VPN Server Issues
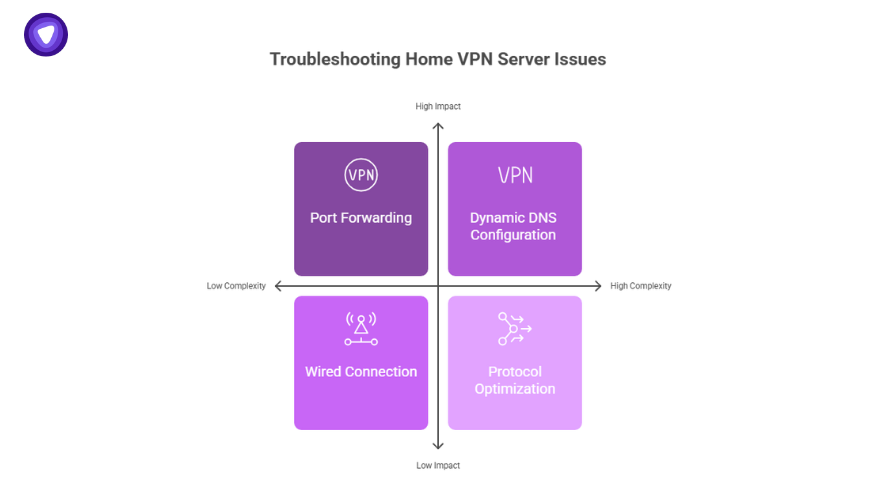
Setting up a home VPN server can be rewarding—but it’s not always smooth sailing. Whether you’re using a router, Raspberry Pi, or PC, here are the most common issues you may face, plus how to fix them.
1. Can’t Connect to the VPN Remotely
Cause: This is often due to missing port forwarding or firewall blocks.
Fix:
- Make sure you’ve forwarded the correct VPN port (e.g., 1194 for OpenVPN) in your router.
- Check that your firewall allows inbound connections on that port.
- If you’re using dynamic DNS, confirm that it’s pointing to your current public IP.
2. Slow VPN Speeds
Cause: Encryption is resource-heavy, and home hardware can bottleneck your speed.
Fix:
- Use a protocol like WireGuard—it’s faster than OpenVPN on most devices.
- If using a router, ensure it has a decent CPU.
- Avoid running heavy processes on your VPN server host.
Note: According to industry data, over 40% of VPN users report performance issues when using DIY setups without optimized hardware. That’s why choosing the right device—or even commercial solutions—can make a difference.
3. VPN Disconnects Frequently
Cause: Network instability or power-saving settings on your server device.
Fix:
- Keep your VPN server device on a wired connection instead of Wi-Fi.
- Disable sleep or hibernation modes.
- Monitor your router logs for dropped packets or DHCP conflicts.
Best Practices for Securing Your Home VPN Server
Your home VPN server is only as secure as its weakest setting. If you’re handling sensitive files or remote access, follow these security tips:
Use Strong Encryption
Stick with AES-256 or ChaCha20, depending on your VPN protocol. Avoid outdated options like PPTP or L2TP/IPsec.
Protect Your Login Credentials
Don’t use default usernames or passwords. Create long, unique credentials and store them in a secure password manager.
Keep Software Up to Date
Update your VPN software and firmware regularly. Most vulnerabilities stem from outdated services.
Limit User Access
Only allow specific devices or IPs to connect if possible. This limits attack surface.
Monitor Server Logs
Check logs for suspicious IPs or unusual access patterns. Many vpn server for home setups support basic log analysis tools.
VPN Server vs. VPN Client
Understanding the difference between a VPN server and a VPN client is crucial when setting up a VPN.
- A VPN Server is the backbone of the VPN infrastructure. It handles incoming connections, encrypts data, and sends encrypted data back to the VPN clients. When setting up a home VPN server, you configure the device to act as the VPN server, managing all traffic between clients and the Internet.
- A VPN Client is the device (e.g., laptop, smartphone, tablet) that connects to the VPN server. For businesses, the client software is typically installed on each employee’s device, enabling them to connect to the VPN and securely access the company’s network.
When you set up a Home VPN Server, your clients (your remote devices or employees) need the necessary software to connect to the server. Popular VPN clients include OpenVPN Connect, the native VPN support on Windows or macOS, and VPN clients on mobile devices. For example, you can easily learn how to set up a virtual private network on Android by following basic instructions, making it possible for employees to connect securely from their phones.
How to Put VPN On Your Router?
There are several ways to set up a home VPN server, and the method you choose will depend on the level of security, control, and ease of setup you prefer. Let’s break down the different options.
1. Get a VPN Router
A dedicated VPN router is one of the easiest methods to set up a home VPN server. These routers are pre-configured to support VPN protocols, meaning less setup work for you.
Steps:
- Purchase a VPN Router: Look for routers that support popular VPN protocols like OpenVPN or WireGuard. Brands like Asus, Linksys, and Netgear offer routers that come pre-installed with VPN capabilities.
- Access Router Settings: Log in to your router’s administration interface. This is usually done by entering the router’s IP address into a web browser.
- Configure the VPN: Navigate to the VPN settings. Most VPN routers will have a dedicated VPN tab where you can set up the VPN server.
- Enable the VPN Server: Follow the on-screen instructions to enable the VPN server. You’ll need to specify the VPN protocol, configure encryption settings, and create user profiles for remote access.
- Test Remote Access: Once the VPN is set up, test it by connecting to the VPN from a remote device using the credentials you set up.
2. Flash Your Router
If you already own a router that doesn’t support VPN out of the box, you can still set up a VPN server by flashing your router with custom firmware. Flashing refers to the process of installing custom firmware, such as DD-WRT or OpenWrt, which unlocks additional features not available in the factory settings.
Steps:
- Check Compatibility: Not all routers can be flashed. Check the DD-WRT or OpenWrt websites to ensure your router model is compatible with their firmware.
- Download the Firmware: Go to the website of the firmware you’re installing (e.g., DD-WRT), download the appropriate firmware for your router, and follow the installation instructions.
- Flash the Router: Follow the manufacturer’s guidelines for flashing the firmware. This usually involves logging into the router’s web interface and uploading the custom firmware file.
- Set Up the VPN: Once the firmware is installed, log back into your router’s admin interface. You should now have access to the VPN configuration settings under the custom firmware.
- Configure the VPN: Set up the VPN server using OpenVPN or another protocol, following the specific steps for your firmware.
- Test the VPN: Test the VPN connection from an external network to ensure it’s working correctly.
3. Use Other Devices as a VPN Server
If you don’t want to invest in a dedicated VPN router, you can host the VPN server on another device, such as a PC, NAS (Network Attached Storage), or even a Raspberry Pi. This method is more involved but offers flexibility.
Using a PC as a VPN Server
For Windows:
- Install OpenVPN: Download and install OpenVPN software on your Windows computer. OpenVPN is a free, open-source VPN solution that works well for creating a home VPN server.
- Configure the VPN: OpenVPN requires some manual configuration. You’ll need to set up certificates and keys to authenticate users securely.
- Port Forwarding: Log in to your router’s admin interface and forward the port that OpenVPN uses (by default, it’s UDP 1194). This allows external devices to connect to your VPN server.
- Test Remote Access: Once OpenVPN is running on your PC, test it by connecting from a remote location using an OpenVPN client.
For macOS:
- Install VPN Server Software: macOS doesn’t come with built-in VPN server software, so you’ll need to download a third-party application like Tunnelblick or OpenVPN for Mac.
- Configure the VPN: After installing the software, configure the VPN settings based on the application’s instructions.
- Test the Connection: As with Windows, ensure you’ve forwarded the appropriate ports and test the VPN connection from a remote device.
Using a Raspberry Pi as a VPN Server
A Raspberry Pi offers a cost-effective and energy-efficient way to host your own Home VPN Server.
- Install Raspberry Pi OS: Set up the Raspberry Pi with the latest version of Raspberry Pi OS (formerly Raspbian).
- Install PiVPN: PiVPN is a lightweight, easy-to-use VPN solution designed for Raspberry Pi. Open the terminal on the Raspberry Pi and install PiVPN by running the following command:
curl -L https://install.pivpn.io | bash - Configure PiVPN: Follow the on-screen prompts to configure the VPN server, set up security keys, and create user profiles.
- Port Forwarding: Just like with other VPN setups, you’ll need to forward the appropriate ports on your router to allow external devices to connect.
- Test the Connection: Once everything is set up, test the VPN by connecting from a remote location using the OpenVPN client.
4. Rent a Virtual Private Server (VPS)
If hosting a Home VPN Server isn’t feasible due to hardware limitations or slow internet speeds, renting a Virtual Private Server is a great alternative. A VPS is essentially a virtual machine hosted by a provider like DigitalOcean or Amazon Lightsail that can run your VPN server.
Steps:
- Choose a VPS Provider: Popular options include DigitalOcean, Vultr, and Amazon Lightsail. These services allow you to rent a virtual server at an affordable monthly rate.
- Set Up the Server: Once you’ve chosen a VPS provider, set up a basic server instance running Linux (Ubuntu is a good choice for most users).
- Install OpenVPN: Use a script like the OpenVPN Access Server script to install and configure the VPN software on your VPS.
- Configure the VPN: Set up certificates and encryption settings and configure user profiles for accessing the VPN.
- Test Remote Access: Connect to the VPS from a remote device using OpenVPN or a similar client. Since VPS providers often have fast and reliable internet connections, you’ll likely see better performance than you would with a home VPN server.
5. Opt for a Cloud Computing Service
Cloud computing services such as Amazon AWS and Google Cloud offer a flexible way to host a VPN into your home network. With cloud computing, you can create a virtual machine (VM) that functions as your VPN server.
Steps:
- Create an AWS or Google Cloud Account: Sign up for an AWS or Google Cloud account. Both platforms offer a free tier for new users, which may be sufficient for small-scale VPN use.
- Launch a Virtual Machine: Create a new VM instance using Amazon EC2 (for AWS) or Google Compute Engine (for Google Cloud). Choose a basic Linux instance, as Linux is lightweight and well-suited for VPN use.
- Install VPN Software: Install OpenVPN or another VPN solution on your virtual machine.
- Configure the VPN: Set up the necessary certificates, keys, and encryption protocols. Since the cloud provider will host the VPN, you don’t need to worry about port forwarding.
- Test the Connection: Connect to the cloud-hosted VPN server using a VPN client, ensuring that everything works smoothly.
How to Check if Your Home VPN Server is Working?
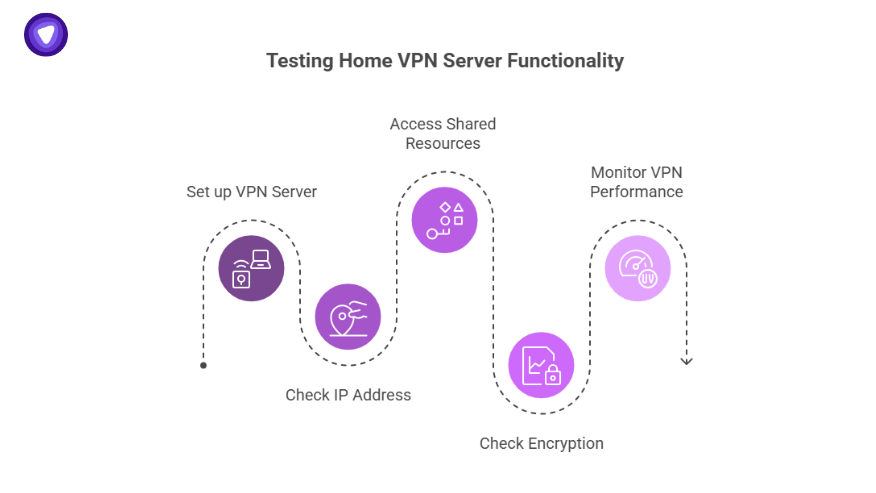
Once your home VPN server is set up, it’s important to test it thoroughly to ensure everything is functioning as expected. Here’s how to verify that your VPN server is working properly:
- Check Your IP Address: One of the simplest ways to verify that your VPN is working is by checking your IP address. After connecting to the VPN, visit a site like WhatIsMyIP.com to check if your IP address matches your home network’s. If it does, your VPN will successfully route traffic through your home network.
- Access Shared Resources: If you set up the VPN to allow access to your home network’s resources (like shared files or printers), try accessing those resources remotely. This will confirm that your VPN tunnel to your home network is working as intended.
- Check Encryption: Use network monitoring tools like Wireshark to verify that your data is being encrypted properly. This is particularly important if you’re handling sensitive business data.
- Monitor VPN Performance: Test the speed and reliability of your VPN connection by browsing websites, streaming content, or downloading files. If the VPN connection is slow or unreliable, you may need to troubleshoot issues with your internet connection or VPN configuration.
Conclusion
Setting up a Home VPN Server is a great way for businesses and individuals to ensure secure, encrypted access to a home or office network from anywhere in the world. Whether you’re looking to create a VPN to home network, provide remote access to employees, or secure your internet traffic, a home VPN server offers flexibility, control, and enhanced privacy.
While the setup process may require some technical expertise and initial investment, the long-term benefits of having your own residential VPN solution far outweigh the challenges. Businesses can save money by avoiding subscription fees for commercial VPNs, enjoying greater control over their network security, and providing employees with a secure connection to the office network.
For businesses that need a reliable VPN solution without the hassle of setting it up themselves, PureVPN White Label offers an excellent alternative. By using a white label VPN service like PureVPN, businesses can offer a fully branded VPN experience to their customers or employees while outsourcing the infrastructure and maintenance to a trusted VPN provider.
By following the steps outlined in this guide, you now know how to get a VPN, how to host my VPN, how to make VPN, and even how can I set up a VPN on different devices, such as Android. Whether you’re building a DIY cheap VPN solution or investing in VPN hardware, setting up a Home VPN Server will help ensure your business data and communications remain secure.