A VPN kill switch is a critical feature for Linux users who rely on privacy and uninterrupted encryption. Whether you’re accessing internal servers, deploying software, streaming content, or managing remote environments, a kill switch ensures that no internet traffic leaks if the VPN connection drops unexpectedly.
PureVPN offers a built-in kill switch feature for Linux through its command-line interface (CLI), enabling full protection without the need for a graphical user interface or third-party tools. This guide explains how PureVPN’s kill switch works, how to enable it on Linux, and how to test that it’s working properly.
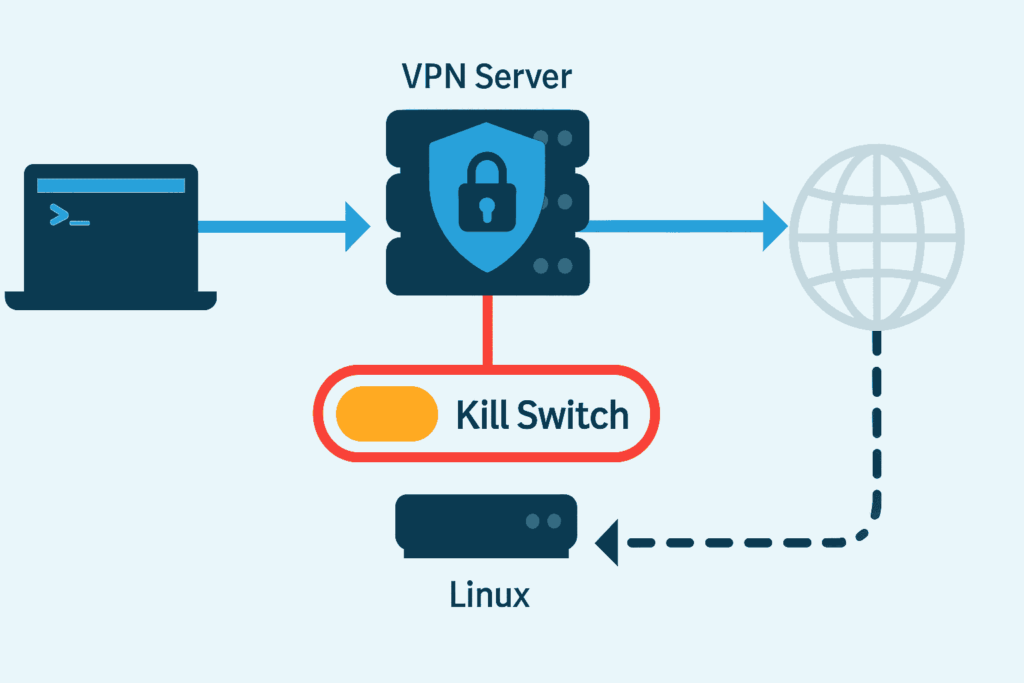
What Is a Kill Switch on a Linux VPN?
A kill switch is a VPN safety mechanism that blocks internet access the moment the VPN tunnel disconnects. Without a kill switch, your Linux system could fall back to the default network route, exposing your real IP address and DNS traffic.
Definition:
A Linux VPN kill switch prevents traffic from leaving your system unless it is routed through an active VPN tunnel.
Why Use Kill-Switch for Linux VPN?
Linux users often perform security-critical tasks such as SSH logins, Git pushes, server maintenance, P2P file transfers, and remote desktop sessions. If the VPN unexpectedly disconnects, these tasks could continue over an unencrypted connection, compromising:
- Your real IP address
- File transfers or credentials
- Streaming or location-sensitive sessions
- Developer access to sensitive repositories or CI/CD pipelines
PureVPN’s kill switch prevents these risks by blocking all internet traffic outside the VPN tunnel.
How Does PureVPN Implement a Kill Switch on Linux?
PureVPN provides a native kill switch integrated into its Linux CLI app. Once enabled, it actively monitors the VPN connection and applies system-level firewall rules (via iptables) to ensure traffic only flows through the encrypted VPN tunnel.
Key Details:
- Type: CLI-based implementation (no GUI required)
- Mechanism: iptables routing rules to drop non-VPN packets
- Compatibility: Works with OpenVPN and WireGuard protocols
- Fallback Blocking: Covers both IPv4 and IPv6 traffic
- Leak Protection: Complements PureVPN’s built-in DNS leak protection
Supported Linux Distributions
| Distribution | Compatibility |
| Ubuntu 20.04+ | Yes |
| Debian 10–12 | Yes |
| Fedora 34+ | Yes |
| Kali Linux | Yes |
| Arch Linux | Yes (manual) |
| Linux Mint | Yes |
| Pop!_OS | Yes |
| Zorin OS | Yes |
| Manjaro | Yes |
How to Enable the PureVPN Kill Switch on Linux (Step-by-Step)
Follow these steps to install PureVPN and activate the kill switch for secure and private VPN usage on any supported Linux system.
Step 1: Install the PureVPN CLI
- Open your terminal.
- Download the installer using this command:
wget https://cdn.purevpn.net/linux/setup.sh - Make the script executable:
chmod +x setup.sh - Run the script:
./setup.sh
This will install the PureVPN CLI app on your system.
Step 2: Log in to Your PureVPN Account
- After installation, type:
purevpn –login - Enter your PureVPN email and password when prompted.
Step 3: Connect to a VPN Server
To connect to a VPN server (for example, the UK), enter:
purevpn –connect “UK”
You’ll be securely connected and assigned a UK IP address.
Step 4: Enable the Kill Switch
To activate the kill switch feature, run:
purevpn –killswitch enable
You’ll see a confirmation message:
Kill switch has been enabled. Internet will now be blocked outside VPN tunnel.
Step 5: Disable the Kill Switch (Optional)
To disable the kill switch when needed, use:
purevpn –killswitch disable
This restores normal internet access outside of the VPN tunnel.
What Happens Behind the Scenes?
Once enabled, PureVPN modifies your iptables rules to ensure:
- All traffic must pass through the VPN interface
- If the VPN drops, outbound traffic is rejected
- DNS leaks and fallback routing are blocked
- IPv6 connections are restricted or redirected when applicable
This configuration is automatically restored when reconnecting the VPN or disabling the kill switch.
How to Test If the Kill Switch Is Working on Linux
Follow these steps to confirm that PureVPN’s kill switch is actively blocking internet traffic when the VPN disconnects:
Step 1: Enable the Kill Switch
Type the following command in your terminal:
purevpn –killswitch enable
This activates the kill switch protection.
Step 2: Connect to a VPN Server
To connect, enter:
purevpn –connect “UK”
You will be assigned a secure IP through a UK-based server.
Step 3: Disconnect the VPN Manually
To simulate a connection drop, run:
purevpn –disconnect
This will terminate the VPN tunnel.
Step 4: Test Internet Access
Now try accessing the internet by running:
ping google.com
curl ifconfig.me
Expected Result:
Both commands should fail. This confirms that the kill switch is working correctly and all internet traffic is blocked unless the VPN is connected.
Best Practices When Using a VPN Kill Switch on Linux
| Recommendation | Why It Matters |
| Enable DNS leak protection | Prevents fallback to unencrypted DNS |
| Disable IPv6 (if not routed via VPN) | Avoids IPv6 leakage |
| Use auto-connect on boot | Ensures VPN runs before any network usage |
| Combine with static IP whitelisting | Allows access to local/private services if required |
Why Is Using a Kill Switch Essential for Linux Users?
- Remote developers connecting to Git or SSH servers
- Privacy advocates using Linux with Tor or Brave
- Linux users streaming BBC iPlayer, Netflix, or Hulu
- Journalists or researchers operating in restricted regions
- Any user dealing with sensitive financial, legal, or backend systems
Wrapping Up
PureVPN’s kill switch for Linux is a powerful privacy safeguard that ensures no internet traffic flows outside the VPN tunnel. By enabling it with a single command, Linux users can lock down their traffic and prevent exposure during connection drops.
PureVPN makes it easy to protect your system on Ubuntu, Debian, Fedora, Kali, and other Linux distributions without requiring manual firewall scripting.
FAQ’s Regarding Kill Switch for Linux VPN
Install PureVPN CLI, connect to a server, then run purevpn –killswitch enable. This command blocks all internet traffic unless the VPN is connected, preventing data leaks and exposure.
No, the kill switch does not persist automatically after reboot. You must reconnect to the VPN and re-enable the kill switch using the command:
purevpn –killswitch enable
For full boot-time protection, combine it with the auto-connect feature.
Yes. PureVPN’s kill switch supports both WireGuard and OpenVPN protocols on Linux. Once enabled, it will block all non-VPN traffic regardless of the protocol in use.
Yes, by default, the kill switch blocks all non-VPN traffic, including access to local IPs (like printers or NAS). If you require local access, you’ll need to configure custom iptables rules outside the PureVPN client.
Tanzeel Ahmed
July 1, 2025
9 months ago