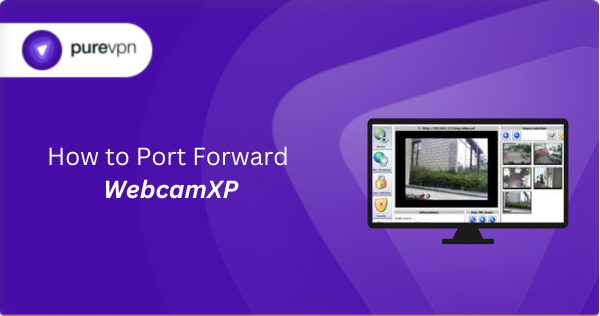
WebcamXP presents an easy graphical interface to configure and track your webcams from anywhere in the world. You can use a maximum of two cameras with the free version. The pro version allows for more customization and cameras.
To get the best online performance on WebcamXP, you will first need to download the application on your preferred platform. You will then need to set the TCP and UDP ports in the program. Port forwarding allows external devices to connect to your WebcamXP server by directing internet traffic through a specific port. If done incorrectly, it can leave your network vulnerable, so it’s crucial to follow best practices.
In this comprehensive guide, we’ll walk you through:
- Security considerations to protect your cameras
- What WebcamXP is and why port forwarding is necessary
- Step-by-step instructions for port forwarding WebcamXP
- Troubleshooting common issues
Understanding How WebcamXP Remote Access Works
WebcamXP is designed to stream video from USB webcams, IP cameras, and capture devices. On your home network (LAN), the feed is extremely accessible because traffic stays inside your private network. But to make it available to the outside world, the router needs permission to accept external traffic and route it to your WebcamXP machine.
This is where port forwarding comes in.
What Ports Does WebcamXP Use?
By default, WebcamXP uses the following key ports:
- HTTP / Web Access: Port 8080
- Streaming Port: Port 8081
- RTSP (if enabled): Port 554
- HTTPS (if configured): Port 443
However, WebcamXP lets you choose your own port numbers from the Settings panel, which is perfect if:
- Your ISP blocks typical ports (80, 443)
- You prefer more secure, non-standard ports
- You want to avoid port conflicts with other applications
Most users stick with 8080, but any port between 1024–65535 is acceptable.
What is WebcamXP and Why Do You Need Port Forwarding?
WebcamXP is a popular software solution that turns your PC into a surveillance system, allowing you to stream video from multiple IP cameras or webcams. While it works well on a local network, accessing it remotely requires port forwarding.
Why Port Forwarding is Necessary
- Local vs. Remote Access: By default, WebcamXP is only accessible within your home network. Port forwarding opens a pathway so you can view your cameras from outside (e.g., your phone or another computer).
- Direct Connection: Instead of relying on third-party cloud services, port forwarding establishes a direct link to your WebcamXP server.
- Better Performance: Since the connection isn’t routed through external servers, you get faster, more reliable streaming.
However, improper port forwarding can expose your network to hackers. We’ll cover security best practices later in this guide.
Requirements to Port Forward WebcamXP
Before you begin the process of port forwarding, make sure you have the following things:
- Downloaded and installed WebcamXP software package.
- The IP address of your router.
- IP address of your device.
- TCP and UDP ports of WebcamXP for your gaming rig. Both of them can be defined by the users in the app.
Steps to Setup WebcamXP Port Forwarding
Step 1: Set a Static Internal IP for Your WebcamXP Machine
Port forwarding won’t work if the internal IP of your PC keeps changing. By default, routers use DHCP to assign different IPs every time a device reconnects. That means the router may forward traffic to the wrong device later.
To avoid this, assign a static IP to the PC running WebcamXP.
How to Set Static IP on Windows
- Open Control Panel → Network & Internet → Network Connections
- Right-click your connection → Properties
- Double-click Internet Protocol Version 4 (TCP/IPv4)
- Select Use the following IP address
- Enter a fixed IP, for example:
- IP Address: 192.168.1.150
- Subnet Mask: 255.255.255.0
- Default Gateway: your router’s IP (e.g., 192.168.1.1)
- DNS: Use Google DNS (8.8.8.8, 8.8.4.4) or your router’s IP
Alternatively, most routers allow “DHCP Reservation” — you can bind a static IP to your device’s MAC address directly from the router.
This ensures your forwarding rules always point to the correct device.
Step 2: Configure WebcamXP Port Settings
Now open WebcamXP:
- Launch WebcamXP
- Go to Settings → Web / Broadcast
- Note the default Web server port (8080)
- Enable/verify the port is active
- If you want to change it, enter a custom port (e.g., 8888, 9000, 50000)
Write down the port number—you’ll need it for your router settings.
Step 3: Login to Your Router’s Port Forwarding Page
Every router brand has a slightly different layout, but the process is the same:
- Open a browser
- Enter your router’s IP:
- Common options include 192.168.1.1, 192.168.0.1, 192.168.8.1, 10.0.0.1
- Login using your admin username and password
- Usually written on the router label
- Or default credentials like admin/admin
Inside your router dashboard, look for:
- Port Forwarding
- NAT
- Virtual Server
- Advanced → NAT Forwarding
- Firewall Rules
These all lead to the same feature.
Step 4: Create the WebcamXP Port Forward Rule
Here’s the required information:
- Service Name: WebcamXP
- Protocol: TCP (for web access) or TCP/UDP if unsure
- External Port: 8080 (or your custom port)
- Internal Port: 8080
- Device / Internal IP: The static IP you assigned earlier (e.g., 192.168.1.150)
Example Entry (Most Routers)
| Field | Value |
|---|---|
| Service | WebcamXP |
| Protocol | TCP |
| External Port | 8080 |
| Internal Port | 8080 |
| Internal IP | 192.168.1.150 |
Press Save and reboot the router if required.
Step 5: Allow WebcamXP Through Windows Firewall
If Windows Firewall blocks the port, forwarding won’t work.
To fix:
- Open Windows Firewall
- Select Advanced Settings
- Click Inbound Rules → New Rule
- Choose Port → TCP → Specific Port: 8080
- Allow the connection
- Name it WebcamXP Port
Now your PC will accept traffic on your custom port.
Step 6: Find Your Public IP Address
To access your feed from outside the network, you need your public IP.
Search “What is my IP” on Google.
You will see something like:
- 103.55.xxx.xxx
- 39.52.xxx.xxx
Combine it with your port:
http://YOUR_PUBLIC_IP:8080
Example:
http://39.52.125.87:8080
This URL should now load your WebcamXP feed globally.
Step 7: Test Your Port Forwarding
Use one of these tools:
- CanYouSeeMe.org
- YouGetSignal
- IPVoid Port Checker
Enter your port number (e.g., 8080) and check if it’s open.
If Open:
Your WebcamXP feed is now accessible anywhere.
If Closed:
You likely have one of these issues:
- Wrong internal IP
- ISP blocks inbound ports
- Double NAT (common with CGNAT or fiber ONTs)
- Firewall blocking the port
- Router missing the rule
We’ll troubleshoot this below.
How to Test Your Port Forwarding Configuration
Once you’ve configured your router, it’s crucial to test if the port forwarding is working correctly.
- Find Your Public IP Address: This is the IP address your router uses to communicate with the internet. You can find it by visiting a website like “What is my IP” (e.g., whatismyipaddress.com) from a device connected to your home network.
- Test from an External Network:
- Smartphone (using mobile data): Disable Wi-Fi on your phone and try to access your WebcamXP stream using your public IP address followed by a colon and the forwarded port number (e.g.,
http://your_public_ip:8080). - Friend’s House/Another Network: Ask a friend to try accessing your WebcamXP stream using the same format.
- Smartphone (using mobile data): Disable Wi-Fi on your phone and try to access your WebcamXP stream using your public IP address followed by a colon and the forwarded port number (e.g.,
- Use an Online Port Checker: Websites like
portchecktool.comallow you to enter your public IP address and the port number to see if the port is open and reachable from the internet.
Troubleshooting Common Port Forwarding Issues
Problem 1: WebcamXP Doesn’t Load Remotely
- Firewall Blocking Access: Ensure Windows Firewall allows WebcamXP (Go to Control Panel > Firewall > Allow an App).
- ISP Restrictions: Some ISPs block common ports. Try a different port (e.g., 8081 instead of 8080).
- Dynamic IP Change: Your public IP may change. Consider a DDNS service (like No-IP) for a stable hostname.
Problem 2: Router Doesn’t Save Port Forwarding Rules
- Reboot the router after saving changes.
- Check for firmware updates in the router settings.
Problem 3: Can Access WebcamXP Locally but Not Remotely
- Double-check the port number in WebcamXP and router settings.
- Test with a different device (e.g., smartphone on cellular data).
How to Open Ports Behind CGNAT
What if your ISP performs CGNAT? Most ISPs perform CGNAT (Carrier-grade Network Address Translation) to conserve bandwidth and assign a single IP address to multiple users connected to the same internet network. However, CGNAT makes it difficult for you to open ports on the router.
To get around the CGNAT issue, you can use the Port Forwarding add-on to bypass this problem and port forward routers without hassle.
Here’s more information on how to use PureVPN’s Port Forwarding add-on and bypass CGNAT in a few clicks.
Open Ports Behind CGNAT with PureVPN

A lot of ISPs (internet service providers) now perform CGNAT (Carrier-grade Network Address Translation) so they can conserve bandwidth and assign a single IP address to more than one user on their network. But CGNAT is bad for port forwarding because it makes it difficult to open ports on your router.
There is a way to get around the CGNAT issue. Yes, you guessed it right. It’s by using PureVPN’s Port Forwarding add-on. Here’s how you can make it work:
- Sign up for PureVPN, add Port Forwarding to your plan, and complete the payment.
- Download and install the PureVPN app, launch it, and log in using your credentials.
- Access the PureVPN Member Area, go to Subscriptions and click Configure next to Port Forwarding.
- Choose Enable specific ports, enter the ports you want to open, and click the Apply Settings button.
- Open the PureVPN app, connect to a port forwarding-supported server, and you are good to go!
PureVPN’s Port Forwarding Add-on
To most people, port forwarding is quite a demanding task. For starters, every router has a different console, which often makes it difficult to navigate to specific settings.
Secondly, you won’t always be able to open WebcamXP ports on your router if your ISP restricts the ports. Yes, you heard that right! ISPs are notorious for blocking ports due to security reasons. If ISP isn’t the reason behind a blocked port, then perhaps it could be your operating system’s firewall.
Well, you can make all these problems go away and enjoy smooth online gaming on all your desired systems with PureVPN’s Port Forwarding add-on. Through the Port Forwarding add-on, you can allow all ports, disallow all ports, and allow specific ports.
Avoid limited downloading and uploading speeds on WebcamXP with PureVPN’s Port Forwarding add-on.
Security‑First Setup for Privacy‑Aware Users
Unlike typical tutorials that focus only on connectivity, this guide emphasizes security and privacy from the outset—the importance of non-standard ports, authentication, firewall locks, and VPN alternatives caters to power users focused on control and data safety. Also addresses pitfalls of CGNAT, ISP restrictions, router chain forwarding, and loopback testing issues.
Adil Ahsan Ali
November 19, 2025
5 months ago