

Deleting files does not mean they are gone for good. To ensure the security of your sensitive data, properly erasing your hard drive is crucial. In this step-by-step guide, we will show you how to wipe an external hard drive on Windows and Mac, leaving no traces of your personal information behind.
Can an external hard drive be wiped clean?

Yes. It is possible to completely wipe a hard drive, but simply deleting the files on it will not suffice. When you delete files from a hard drive, they are not actually removed – rather, the space they occupied is made available for future use. To clean a hard drive entirely, you need to get rid of the data.
Properly wiping a hard drive guarantees that the files are permanently removed, making recovery impossible. Although freeing up disk space can be achieved by deleting temporary files or defragmenting your hard drive, these methods are not sufficient when you plan to part ways with it.
Wiping a hard drive is also essential when reformatting it for a new operating system. All old data must be completely wiped before the drive can be reformatted to match the new system’s file system.
When should I wipe my external hard drive?
- Before Selling or Donating
If you plan to sell, donate, or give away your external hard drive, it is important to perform a full wipe to ensure your sensitive data is permanently removed, protecting your privacy and preventing potential data breaches.
- Repurposing the Drive
If you intend to repurpose the external hard drive for a different use, wiping it clean will ensure that no remnants of previous data interfere with the new purpose.
- Security Concerns
If you suspect any security breaches, malware infections, or unauthorized access to your external hard drive, a complete wipe can eliminate any potential threats or compromised data.
- Returning or Recycling
If the external hard drive is leased or borrowed, returning it after a thorough wipe is essential to protect your information from falling into the wrong hands.
- Starting Fresh
When you want to start anew, wiping the external hard drive will provide you with a clean slate to store new data without any clutter from the past.
How to wipe an external hard drive on Windows 10 & 11
There are few options available to wipe a hard drive on Windows 10 or 11. Below, will walk you through each procedure for both versions of Windows to erase your data and keep it protected.
Backing up your data
Before wiping a hard drive or undertaking any major changes or repairs on your PC, always backup your data. Remember to save important credentials, passwords, and essential information, as data recovery becomes impossible once the drive is wiped.
If you intend to replace your current computer, consider creating a Windows recovery drive as it enables you to reinstall Windows on your new one, if necessary. Here is how you can do it.
Creating a Windows recovery drive
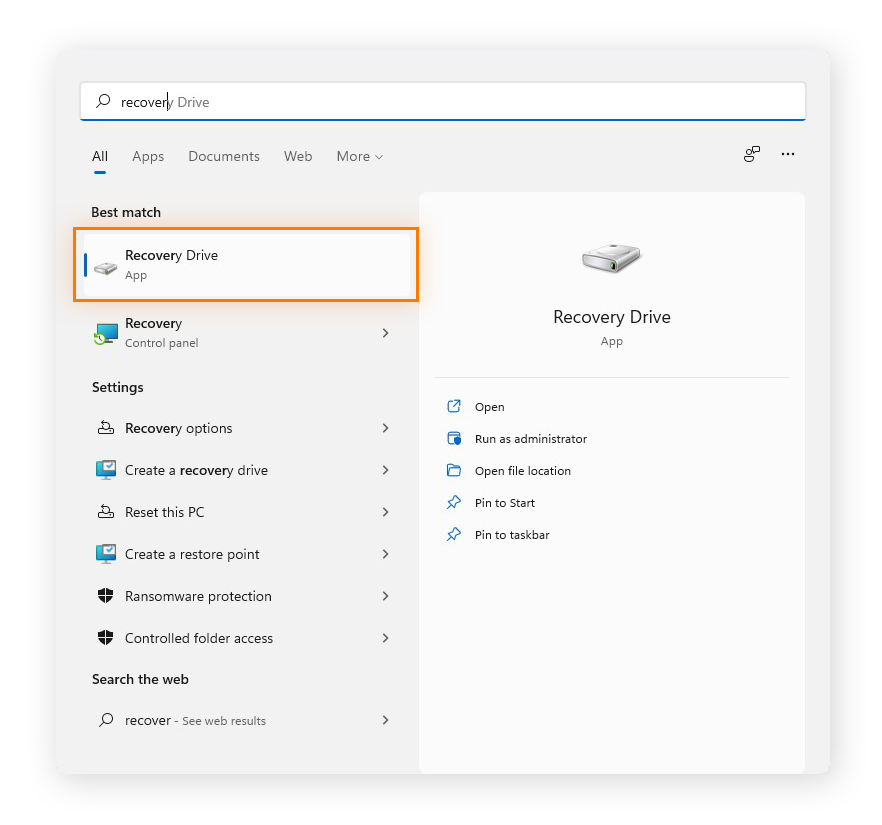
- Simply type recovery drive into the Start menu or search box and choose Recovery Drive. Click Yes to allow Recovery Drive Creator to make changes to your device.
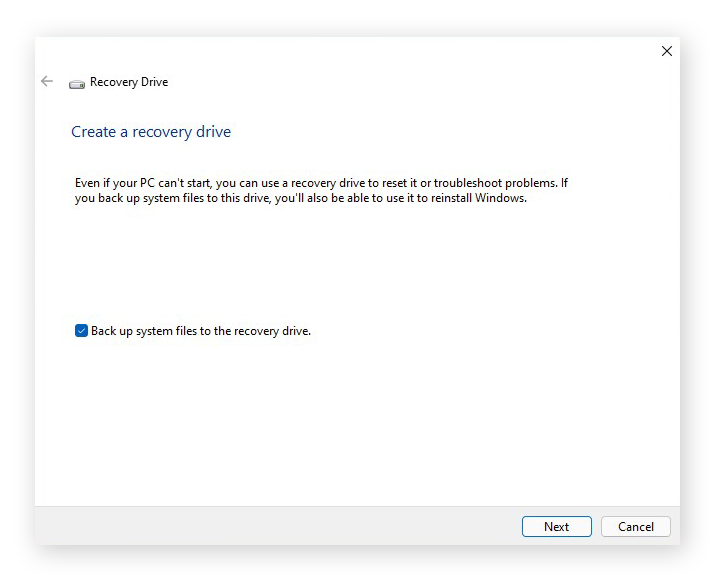
- Check the Back up system files to the recovery drive box and click Next.
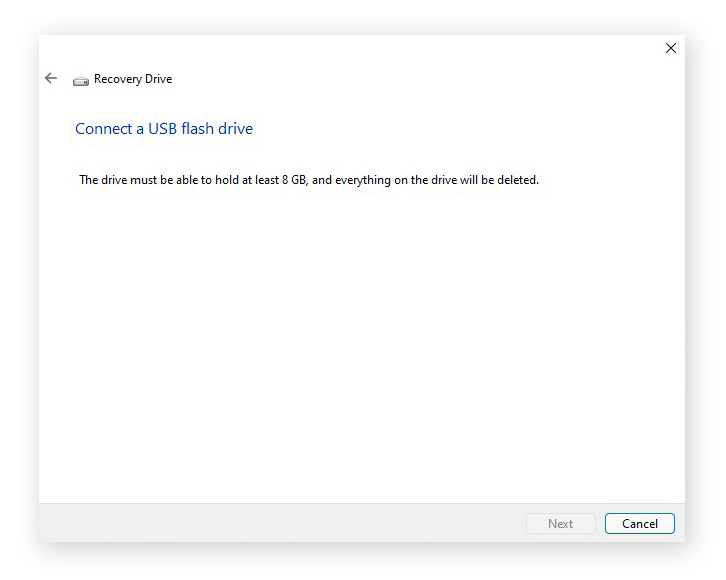
- Connect your external hard drive to your PC via USB. Once done, click Next and then Create on the next screen.
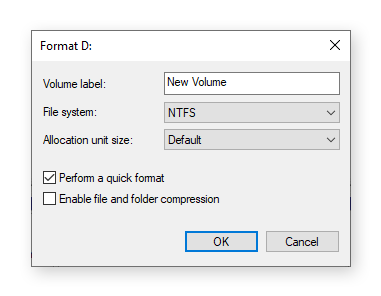
Formatting an external hard drive
When you format an external storage device, it erases all data and readies it for use with your device. Here is how you can do that using the Windows Format tool:
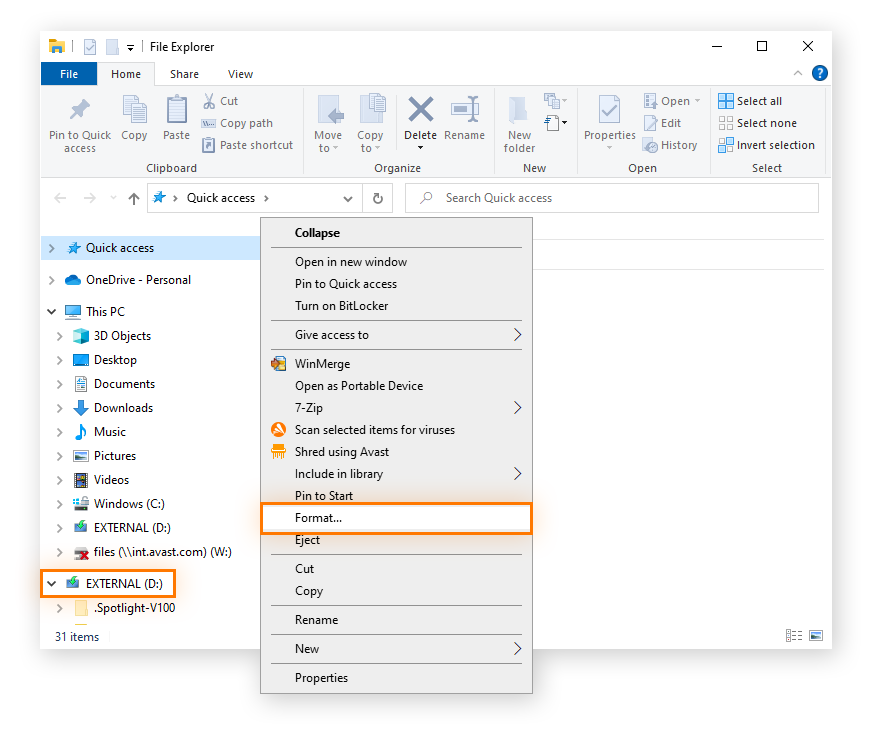
- Connect the external hard drive to your computer via USB and open File Explorer.
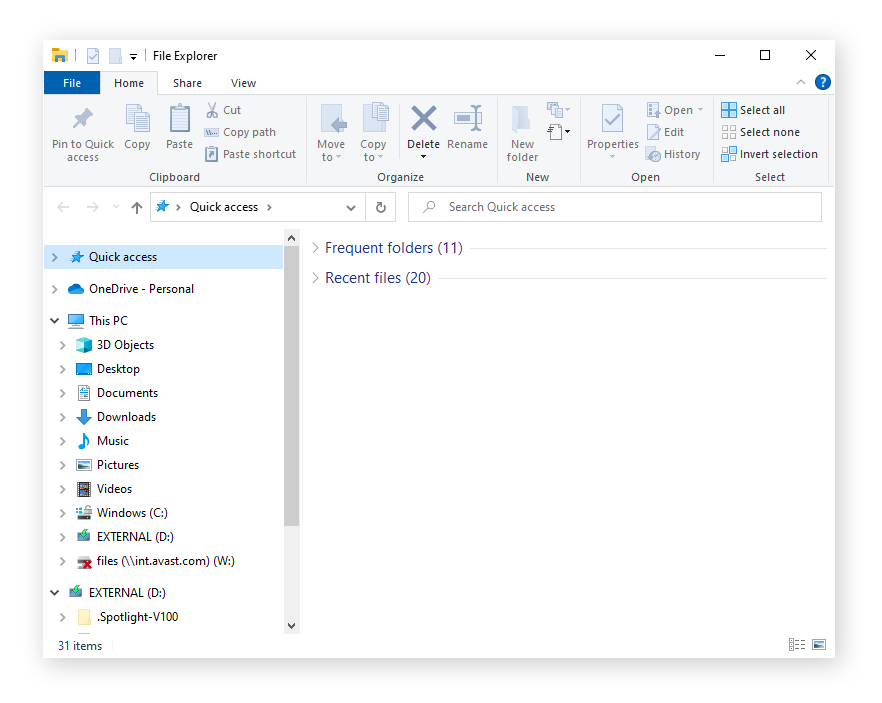
- Right-click the icon representing the external storage device and choose Format. Select a file system like NTFS, FAT32, or exFAT and follow the instructions.
If your external hard drive is not visible in File Explorer, it might be due to its incompatible format with Windows. In such situations, you can use the Disk Management tool to wipe the drive.
Using Disk Management to wipe a hard drive
With the Disk Management tool, you can divide disks into partitions. It allows you to wipe a disk that is not formatted for Windows, but remember to be logged in as an administrator to perform this action. Here is how you can do it:
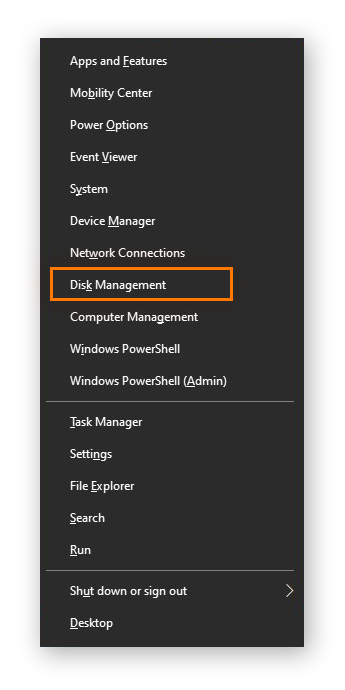
- Connect your external hard drive to your PC via USB. Now, press the Windows + X keys and choose Disk Management.
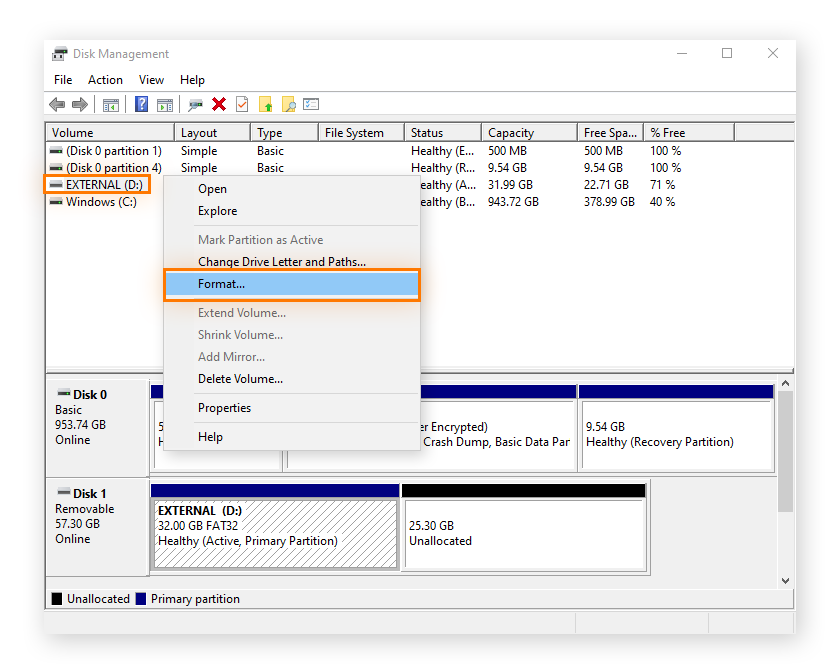
- Right-click the drive you want to wipe and click Format. Select your desired file system.
Initializing a disk
If you encounter issues formatting the drive you wish to wipe, you might need to initialize it. By initializing the drive, you can effectively wipe its contents and reformat it for Windows compatibility. Here is how you can do it:
- To prepare the disk for use, right-click on it and choose Initialize. Next, choose the GPT option and click OK.
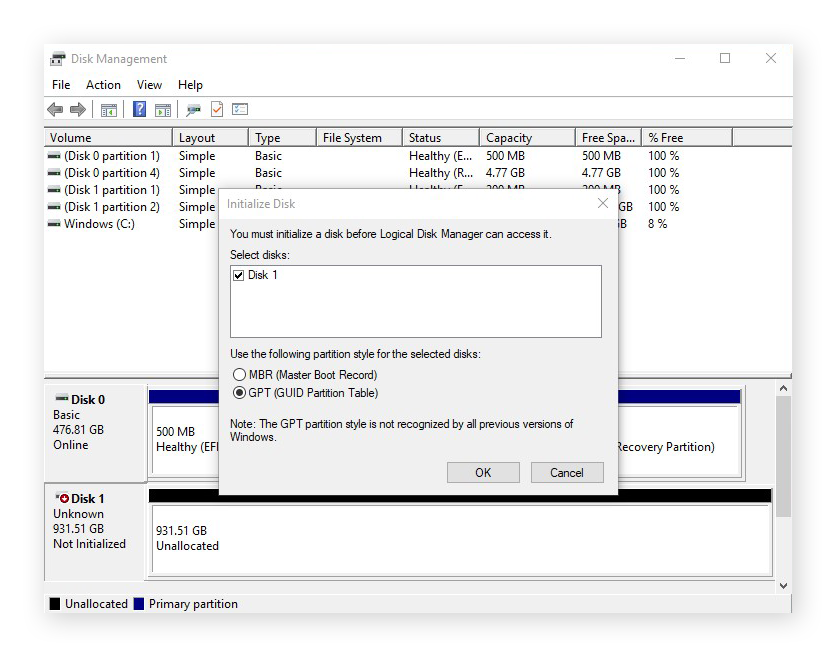
- You can now format the disk using Disk Management, following the steps mentioned earlier. Select the NTFS format to make the disk compatible with Windows.
Resetting your PC
Resetting your PC is a comprehensive process that clears all your programs and data before reinstalling Windows. It serves as an effective solution to address issues with your computer’s performance or to prepare it for resale or disposal.
If you wish to give your computer a fresh start or encounter persistent problems, follow these steps to reset your PC.
On Windows 11
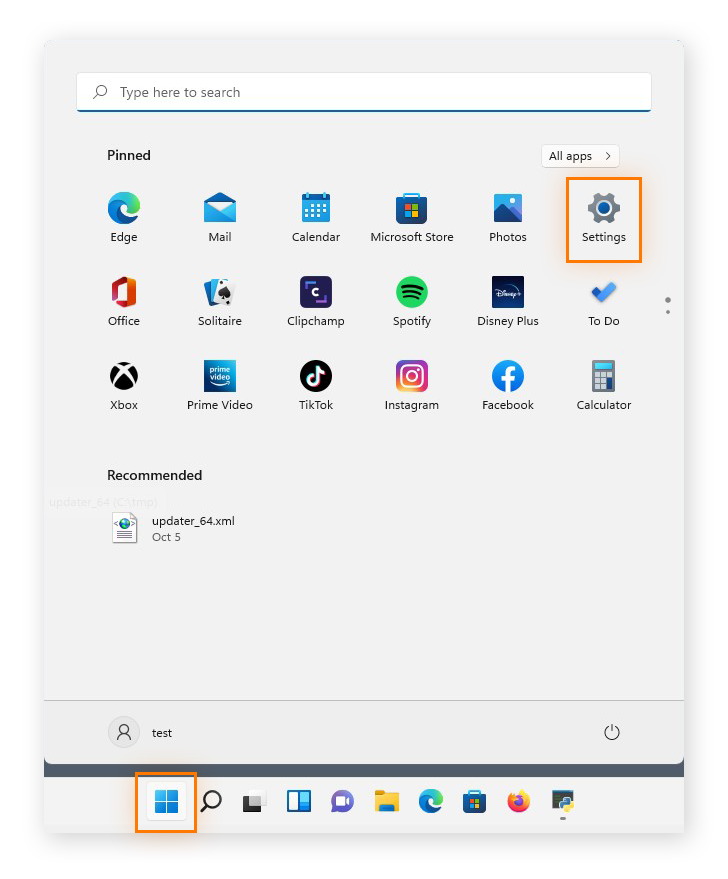
- Go to the Start menu and click Settings.
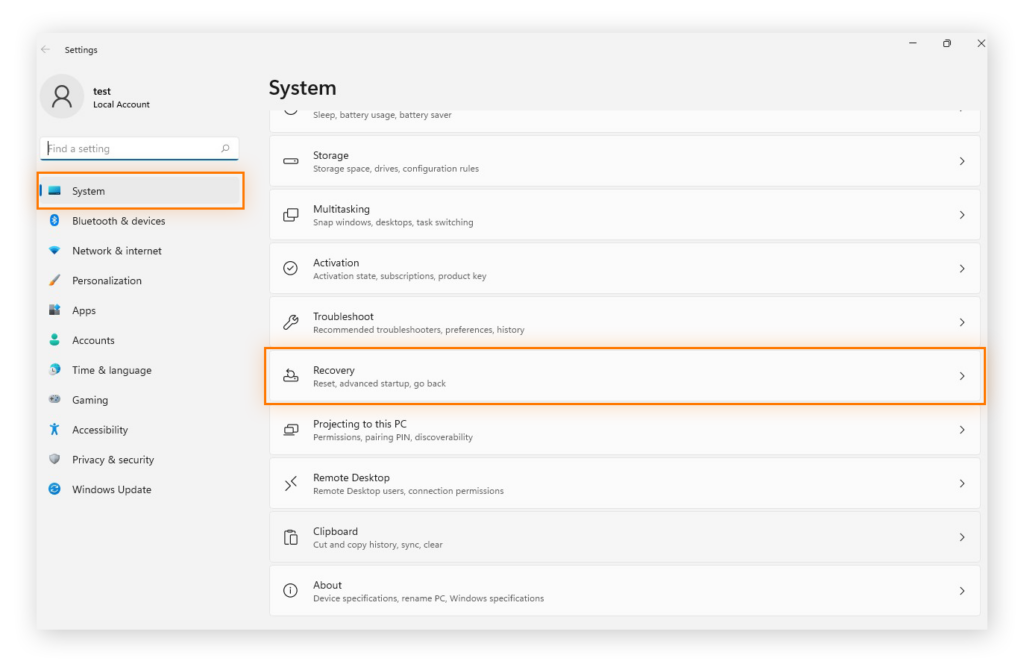
- Choose the System category from the left-side menu and scroll down to Recovery and click it.
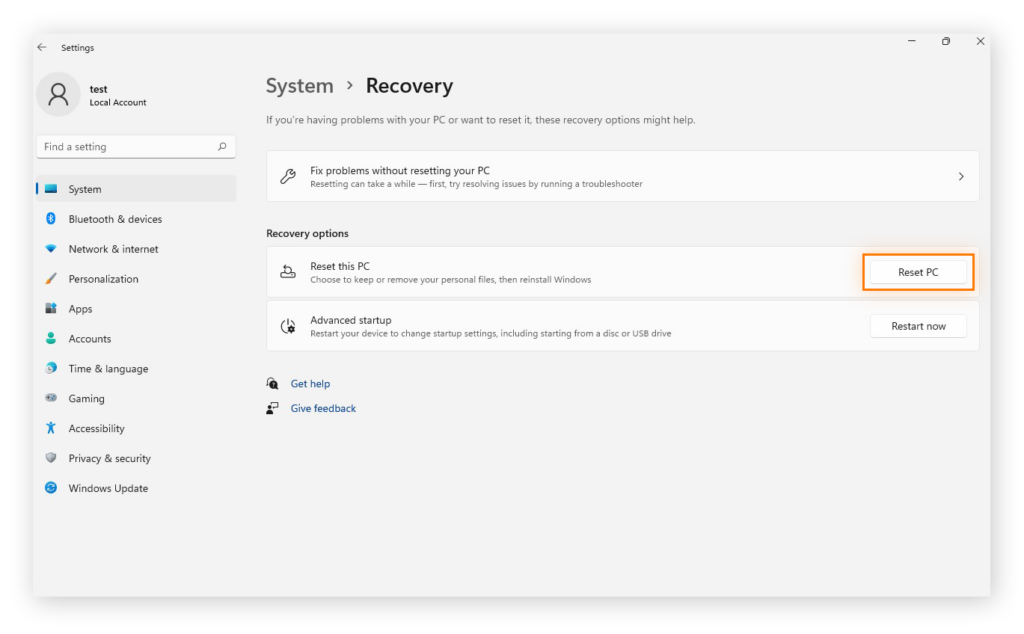
- Click the Reset PC button.
- Choose Remove everything.

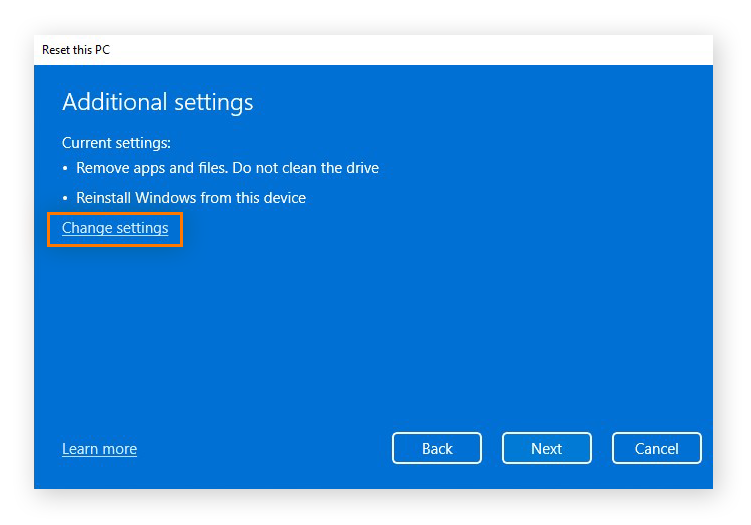
- Select your preferred method for reinstalling Windows. Once done, click Change settings.

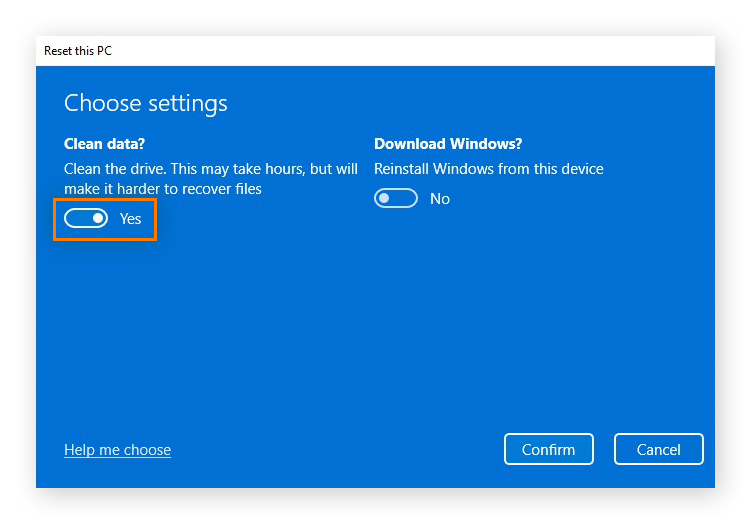
- Activate the Clean data? toggle by switching it on, and then click Confirm.

- Click Next and then Reset.

On Windows 10
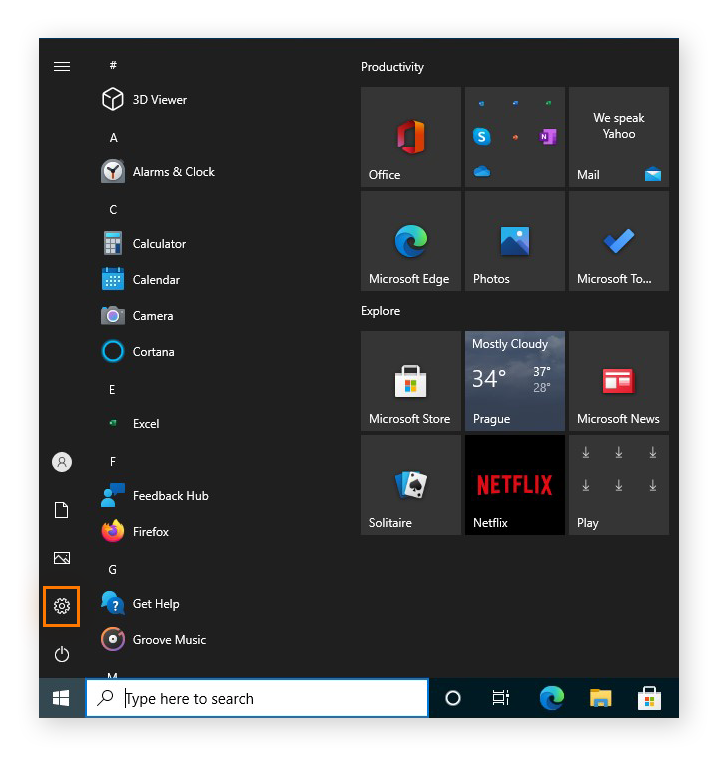
- Go to the Start menu and open Settings.
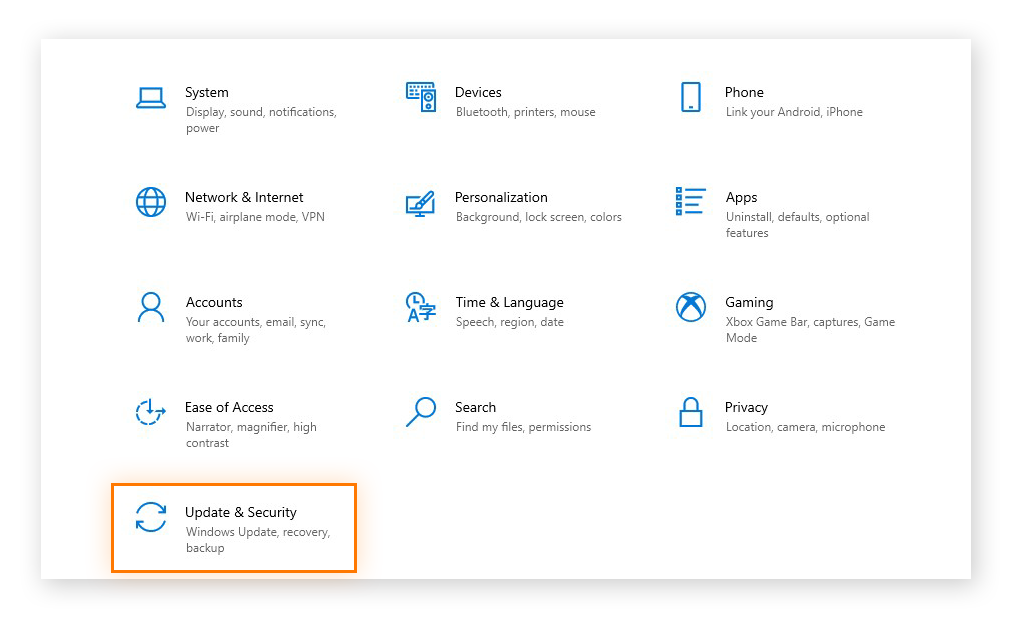
- Select Update & Security.
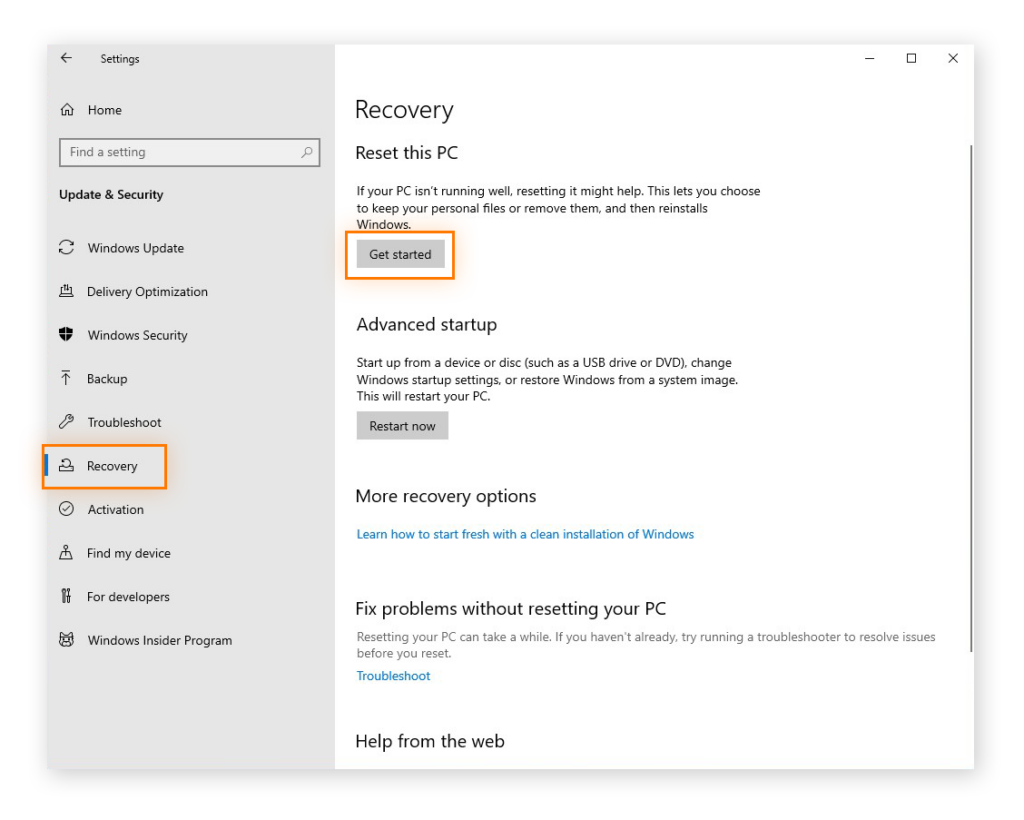
- Choose Recovery in the menu on the left. Under Reset this PC, click the Get Started button.
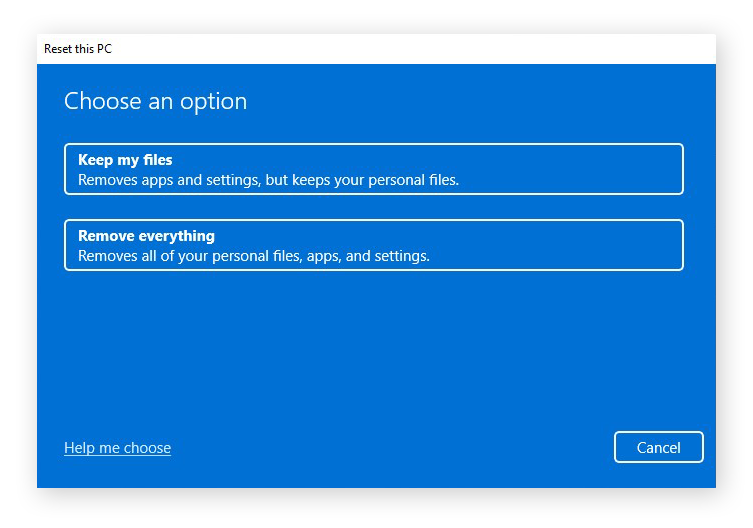
- Select Remove everything.
- Choose a method for Windows reinstallation and then click Change settings.
- Switch the Clean data? toggle on, and then click Confirm.
- Click Next and then Reset.

How to wipe an external hard drive on Mac
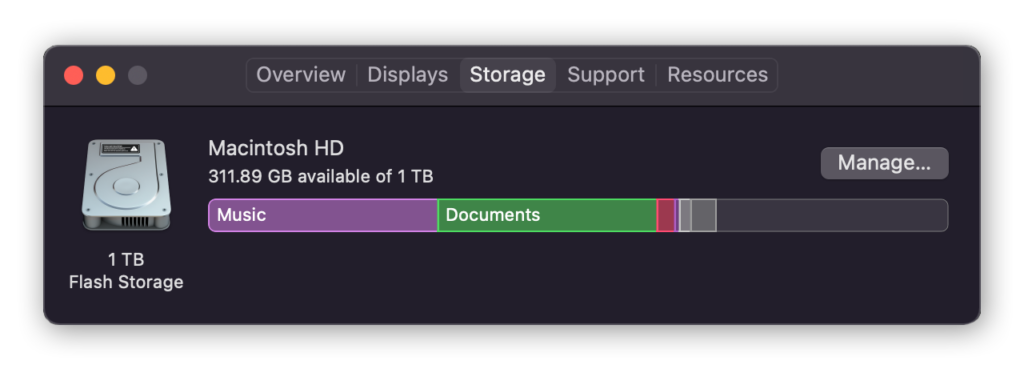
Wiping your hard drive on a Mac varies depending on whether you have a hard disk drive (HDD) or a solid-state drive (SSD). To determine your Mac’s storage type, click on the Apple icon, followed by About this Mac. In the window that appears, navigate to the storage tab to discover the specific storage configuration of your Mac.
Backing up your data

Before you wipe your drive, do not forget to manually back up all your data to an external storage device or a cloud storage solution. Apple provides a built-in Time Machine utility that allows you to back up your computer. You can access it within your System Preferences.
Wiping a hard drive on Mac with an Intel processor
- Turn off your Mac. Next, press the power button and right away hold down the Command + R keys until the Apple logo appears.
- Choose Disk Utility from the list of options.
- Select the target hard drive you want to wipe from the left sidebar.
- Click the Erase button and select a file system.
- If available, click Security Options and then move the slider to the right for the most secure wipe option. If you do not see Security Options, it indicates that Disk Utility cannot wipe your drive.
- Confirm the wipe by selecting Erase and then click Done.
Wiping a hard drive on a Mac with an M1 chip
- Power off your Mac completely. Next, press and hold the power button until the Startup Options window appears.
- Select Options and then click Continue.
- In the next window, choose Disk Utility.
- From the side menu, select your Macintosh HD.
- Click Erase and select a file system for your drive.
- Click Erase Volume Group to proceed with the wipe.
Wiping a hard drive on a Mac with SSD
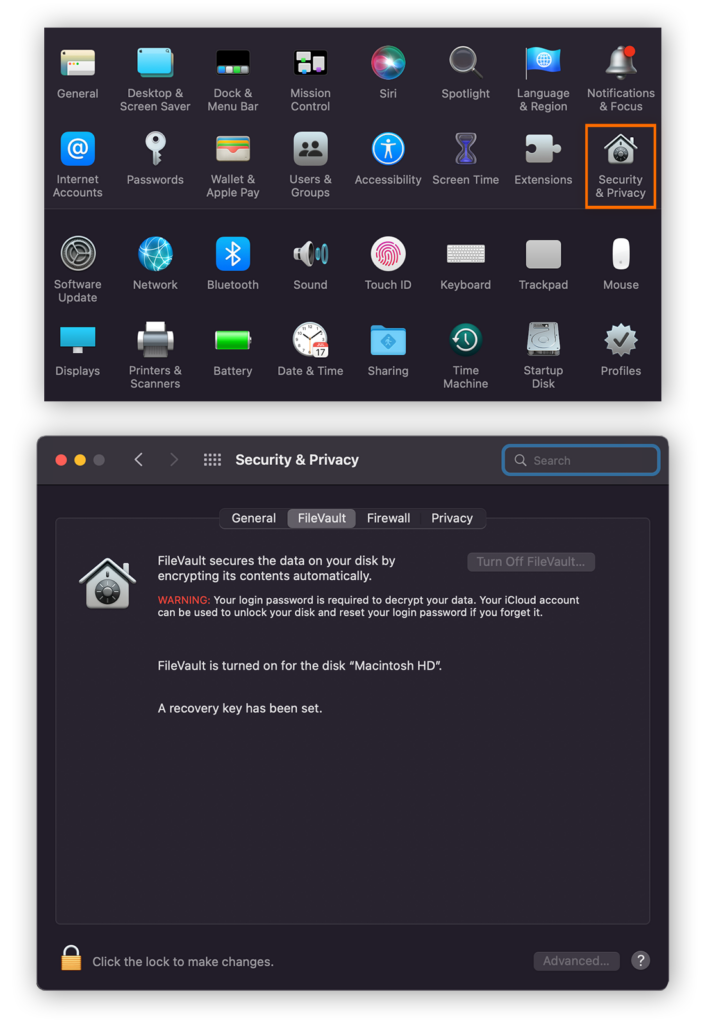
Disk Utility does not support secure wiping for SSDs. Apple recommends using the FileVault utility to encrypt the drive, ensuring no one can access the data on it. To enable FileVault encryption, access Security & Privacy in System Preferences and go to the FileVault tab.
If you decide not to manage FileVault encryption via your iCloud account, ensure you keep the recovery key in a secure place. Alternatively, instead of wiping the drive, you can encrypt it and then delete the FileVault key as follows:
- Encrypt your SSD using FileVault, following the appropriate steps for either Intel or M1 chip Macs.
- Restart your Mac in Recovery mode.
- Open Disk Utility, select your drive, and click Unlock.
- Proceed to erase the now-unlocked drive, which will remove the FileVault key and make the data on the drive unrecoverable.
PureVPN
January 1, 2024
3 years ago


