
In our increasingly interconnected world, where digital boundaries often dictate access, the App Store stands as a prime example. Ever tried to download that hot new game or niche productivity app, only to be met with a frustrating “Not available in your region” message? You’re not alone. The App Store’s content and availability are deeply tied to your Apple ID’s associated country or region. Whether you’ve relocated, are traveling, or simply want to access region-specific content, knowing how to change your App Store location is a valuable skill.
This isn’t just about unlocking new apps; it’s about navigating the digital landscape on your own terms. However, it’s also a process that comes with its own set of rules and considerations. Let’s embark on a detailed journey to understand the “how-to” and “what-ifs” of changing your App Store location.
Why the Change? Unveiling the Motives
Before we dive into the technicalities, it’s worth exploring the common reasons why someone might need or want to change their App Store region:
- Relocation: The most obvious reason. If you’ve moved to a new country permanently, you’ll want your App Store to reflect your new home for local apps, services, and payment methods.
- Accessing Region-Specific Content: Many apps, especially streaming services, games, and even news outlets, are geo-restricted. Changing your App Store location can unlock these previously unavailable titles. Think of it as a digital key to a new library of applications.
- Local Promotions and Pricing: App prices, subscription costs, and special promotions can vary significantly between countries. Shifting your region might allow you to take advantage of better deals or more localized payment options.
- Using a Local Payment Method: If you’re living abroad and have a local bank account or credit card, changing your App Store region enables you to use that payment method for purchases, avoiding international transaction fees.
- Travel and Exploration (with a caveat): While less common for temporary travel due to the complexities, some avid travelers might consider a temporary switch to explore local apps in their destination. However, as we’ll see, this comes with significant hurdles.
The Ground Rules: What You MUST Do Before Changing
Changing your App Store location isn’t a casual flip of a switch. Apple has stringent requirements to ensure account integrity and compliance with regional licensing. Before you even think about tapping that “Change Country or Region” button, you need to address these crucial prerequisites:
Spend or Zero Out Your Apple Account Balance:
This is non-negotiable. Any remaining balance on your Apple ID (from gift cards, refunds, etc.) must be spent entirely. Apple doesn’t allow account balances to be transferred between regions. If you have a small amount remaining, consider buying a cheap app or contacting Apple Support to zero it out if it’s less than the cost of a single item.
Cancel All Active Subscriptions:
This is perhaps the biggest hurdle. Any active subscriptions linked to your Apple ID (Apple Music, iCloud+, third-party app subscriptions, etc.) must be canceled and allowed to expire. You cannot change your region if you have ongoing subscriptions. This means you might have to wait days or even weeks for your subscription periods to end.
Complete All Pending Pre-orders, Rentals, and Refunds:
If you have any pre-ordered apps, rented movies, or pending refunds, these transactions must be completed before you can proceed.
Leave Family Sharing (If Applicable):
If you are part of an Apple Family Sharing group, you’ll need to leave it. Family Sharing groups are tied to a specific region, and you cannot change your individual App Store country while a member. The family organizer might need to change their region first, or you’ll need to be removed from the group.
Have a Valid Payment Method for the New Country/Region:
This is often a sticking point. To complete the region change, you must provide a valid payment method (credit card, debit card, or other accepted local payment options) with a billing address in the new country you’re switching to. This is where many people hit a wall, especially if they don’t have local banking in the target region.
The Step-by-Step Guide: How to Change App Store Region
Once you’ve meticulously addressed the prerequisites, the actual process of changing your App Store location is relatively straightforward. You can do this from your iPhone, iPad, Mac, or even a web browser.
Change Location On iPhone or iPad:

- Open the Settings App: Tap on the grey “Settings” icon on your home screen.
- Tap Your Apple ID: At the very top of the Settings menu, you’ll see your name and profile picture. Tap on it.
- Go to Media & Purchases: Select “Media & Purchases,” then tap “View Account.” You might be prompted to sign in with your Apple ID password, Face ID, or Touch ID.
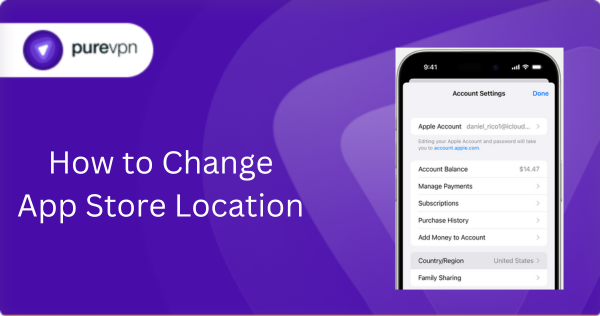
- Select “Country/Region”: Within your Account Settings, you’ll find the “Country/Region” option. Tap it.
- Tap “Change Country or Region”: A list of countries will appear.
- Choose Your New Country/Region: Scroll through the list and select the country or region you wish to switch to.
- Review and Agree to Terms & Conditions: Carefully read the new Terms & Conditions. If you agree, tap “Agree” in the upper-right corner, and then “Agree” again to confirm.
- Enter New Payment Information and Billing Address: This is where you’ll input the valid payment method and billing address for your newly selected country. If you don’t have a local payment method and only intend to download free apps, some regions might allow you to select “None” as a payment option, but this is not universally available and often still requires a valid billing address.
- Tap “Next” or “Done”: Once all the information is entered, tap “Next” or “Done” to finalize the change.
Change Location On Mac:

- Open the App Store App: You can find it in your Applications folder or Dock.
- Click Your Name: In the bottom-left corner of the App Store window, click your name (or “Sign In” if you’re not already logged in).
- Click “Account Settings”: At the top of the window, click “Account Settings.” You might need to sign in again.
- Click “Change Country or Region”: In the “Apple Account Summary” section, click “Change Country or Region.”
- Follow On-Screen Instructions: Select your new country/region, review the terms, and enter your new payment and billing information as prompted.
Related Read: How to Change Location on iPhone
Change Location Via the Web (Apple ID Account Page):
- Go to appleid.apple.com: Open your web browser and navigate to the official Apple ID account management page.
- Sign In: Log in with your Apple ID and password.
- Click “Personal Information”: On the left-hand sidebar, select “Personal Information.”
- Click “Country/Region”: Under the “Account” section, click “Country/Region.”
- Follow On-Screen Instructions: Proceed with the prompts to select your new country and enter the required payment and billing details.
What Happens Next and Beyond
Successfully changing your App Store location is a triumph, but it’s crucial to understand the immediate and long-term implications.
Loss of Previously Purchased Content:
This is a big one. Content purchased in your previous App Store region (apps, music, movies, TV shows, books) may no longer be available for redownload in your new region. This is due to licensing agreements. While installed apps typically continue to function, you won’t be able to update them or redownload them if you delete them.
Updates for Old Apps:
Apps downloaded from your previous region will not receive updates in your new App Store. To update them, you’d theoretically need to switch back to the original region, update, and then switch back – a cumbersome and often impractical process given the restrictions.
Payment Method Dependency:
You are now tied to the payment methods and billing address of your new region. If you ever want to revert, you’ll need a valid payment method for your original country again.
iCloud+ Plan Adjustments:
Your iCloud+ plan pricing may change to reflect the rates in your new country or region.
Family Sharing Re-entry:
If you left a Family Sharing group, you can rejoin one in your new region (or invite family members to join yours if you’re the organizer), but they must also reside in that region.
The “No Credit Card” Conundrum: A Common Dilemma
Many users wonder if they can change their App Store country without a credit card. While some regions might offer “None” as a payment option, it’s increasingly rare and often still requires a valid billing address. The most reliable workaround for downloading free apps without a local credit card is to create a brand new Apple ID for the desired country.
How to Create a New Apple ID for a Specific Region (without a credit card, for free apps):

- Sign Out of Your Current Apple ID: Go to Settings > Your Name > Scroll down and tap “Sign Out.”
- Create a New Apple ID: Go to appleid.apple.com or directly from the App Store when prompted to sign in.
- Crucially, Select the Desired Country/Region during signup.
- When prompted for payment information, choose “None.” You will still need to provide a valid billing address for that country (you can often find publicly available addresses for hotels or businesses, but be mindful of terms of service).
- Verify your new Apple ID via email.
This separate Apple ID allows you to access free apps from that specific region. However, remember you’ll have to switch between Apple IDs to update apps from different regions, which can be inconvenient. This approach is generally recommended for accessing free, region-locked content rather than a full account migration.
When “Change Country/Region” is Greyed Out: Troubleshooting Common Blocks
If you find the “Change Country/Region” option inaccessible, don’t panic. It almost always points back to one of the prerequisites not being met:
- Pending Balance/Subscriptions: Double-check your Apple ID balance and ensure all subscriptions have truly expired. Even a few cents or a subscription that hasn’t officially ended will block the change.
- Family Sharing: Confirm you’ve left any Family Sharing groups. If you’re a child account within Family Sharing, the organizer needs to manage the change or remove you.
- Unfinished Transactions: Ensure no pre-orders, rentals, or refunds are outstanding.
- Contact Apple Support: If you’ve exhausted all options and are certain you meet the requirements, it’s time to contact Apple Support. They can sometimes clear unusual account holds or provide specific guidance.
Advanced Strategies & Workarounds
1. Use a VPN for geo‑unlocking
Sometimes even after switching your region, downloads fail because the App Store detects your real location. A VPN set to the desired country before relaunching the store often helps.
2. Create a second Apple ID
If you want foreign apps but want to preserve your home‑country setup, create a new ID for the other country. Log into that in the App Store when needed, then switch back. Many users find this smoother than juggling subs and credit.
3. Beware of update conflicts
Apps downloaded from the “foreign” store might not update when you return to your home region. You’ll need to log back in to update them.
4. Regional limitations beyond geography
In the EU with iOS 17.4+, Apple now allows third‑party app stores—but only for users physically inside the EU and with their region set to an EU country. Leaving the EU for over 30 days revokes that access. So, location matters—not just account settings.
Connect PureVPN to Access App Store Smoothly
Using a service such as PureVPN can help you to access app store easily . A VPN establishes a private and encrypted link to a server in a different location, allowing you to use the internet as if you were in that location.
Here’s a general step-by-step guide on how to use PureVPN to access Bumble:
- Download and install the PureVPN app on your device.
- Open the PureVPN app and log in to your account.
- Select a server location where you want to connect.
- Click on the “Connect” button to establish a VPN connection.
Once connected, you should be able to access app store as if you were in the location of the server you selected.
Final Words
Changing your App Store location is a powerful tool to customize your digital experience, but it’s far from a casual affair. It demands careful preparation, an understanding of the implications, and often, access to local payment methods in your new desired region. While the process itself is straightforward, the prerequisites are the real gatekeepers.
So, before you embark on this digital migration, take the time to clear your account, understand the potential loss of access to old purchases, and be ready with a valid local payment method. With a little planning and patience, you can truly make your App Store feel like home, no matter where you are in the world.
Frequently Asked Questions
Some countries (like the U.S.) allow selecting “None,” but others require a local card or gift card.
No, but some apps may stop receiving updates if they’re not available in the new region.
Apple limits changes to once every 90 days.
If you’re wondering how to change my location to another country, you can do so in your Apple ID settings. Updating your country allows you to access apps, games, and content that are only available in that region, making it easy to explore global apps legally.
How to switch app store region may affect active subscriptions and payment methods, so you may need to update billing details.
People search how to switch app store region to download apps that are not available in their current country.
PureVPN
January 28, 2026
2 months ago


