How to Add Subtitles To Kodi in 2023
In this guide, you can learn how to add subtitles on Kodi with OpenSubtitles and Subscene. These Kodi add-ons are best-suited for those who like streaming movies with subtitles and using compatible devices. Get PureVPN to enjoy streaming channels on Kodi hassle-free.
Some video add-ons for Kodi come with automatic subtitle fetching capabilities, but they do not work with all videos. Sometimes you need to put in a little extra legwork to gain better control over your selection and get the right subtitles for your video.
Table of Contents
- Why Do You Need Kodi Subtitles?
- How to Add Subtitles in Kodi using OpenSubtitles
- How to Add Subtitles in Kodi using Subscene
Why Do You Need Kodi Subtitles?
Kodi subtitles become essential, especially when you’re streaming video content in a foreign language. Let’s suppose that you’re not a native English speaker; it may get difficult to spontaneously catch up with the dialogues. Thus, adding subtitles can make sure that you consume the whole content without missing a second. Subtitles also come in handy when the audio quality isn’t great, or when you need to turn the volume down to a barely audible level.
How to Add Subtitles in Kodi using OpenSubtitles
Opensubtitles is indeed the best service for the purpose. The service has subtitles available for almost all movies and TV shows released till date in a wide range of languages. Here’s how you can add subtitles to Kodi using OpenSubtitles.
Step 1: Go to OpenSubtitiles and register for a free account.
Click on ‘register’ from the top of the page and follow the instructions to create a new ID and password. The process may take more than a few steps, so be patient.
Step 2: Click on the gear icon from the screen’s top left and open ‘system.’

Step 3: Select ‘Add-ons’

Step 4; Select ‘Install from repository’
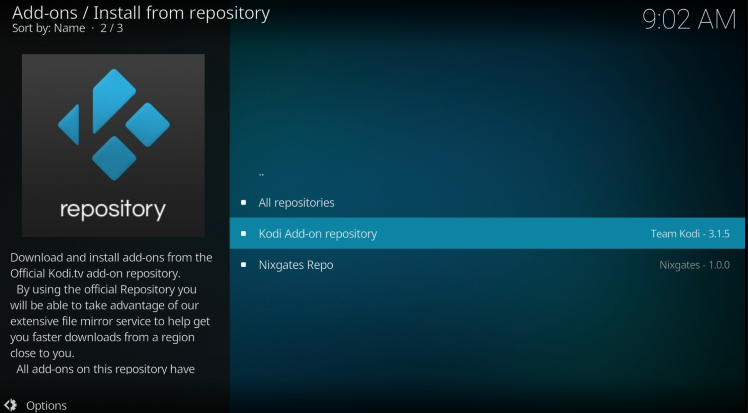
Step 5: Choose ‘Kodi Add-on repository’ from the list.
This is the official repo that comes by default with Kodi. Note: Skip to step 6 if you don’t have at least one repository installed other than Kodi’s built-in repo.

Step 6: Choose ‘Subtitles’ from the list
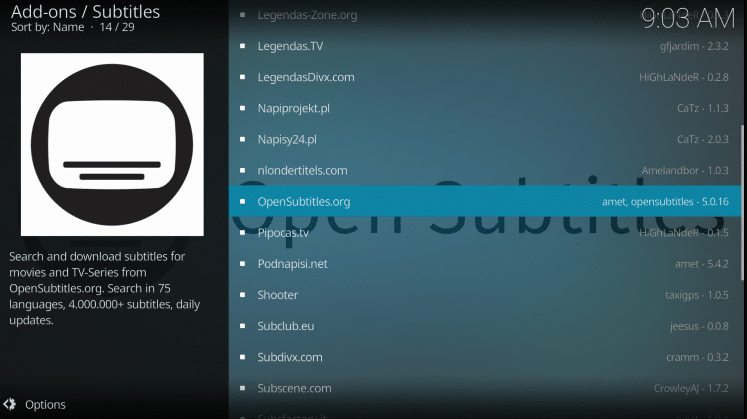
Step 7: Now, choose ‘OpenSubtitles.org.’
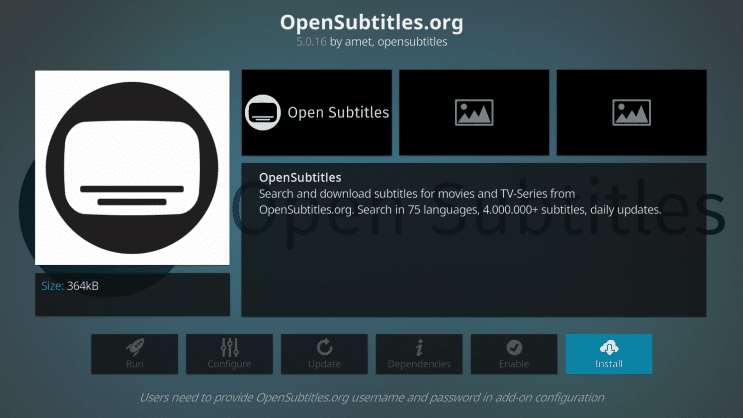
Step 8: Click on the ‘install’ button

Step 9: ‘OpenSubtitles.org’ will show on the screen’s top right corner once the installation has been completed
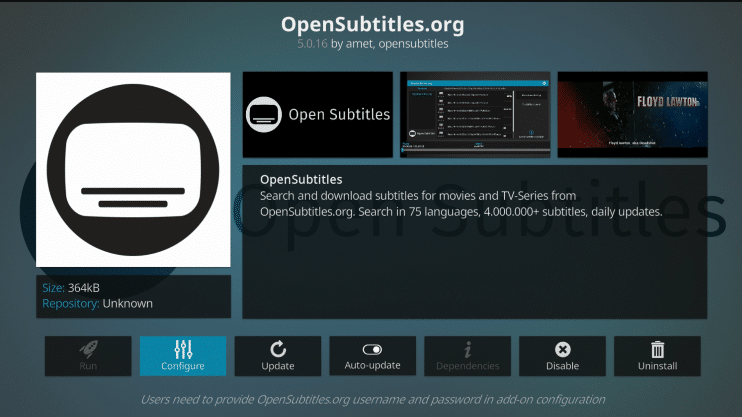
Step 10: Now click on ‘OpenSubtitles.org’ and then click ‘configure.’
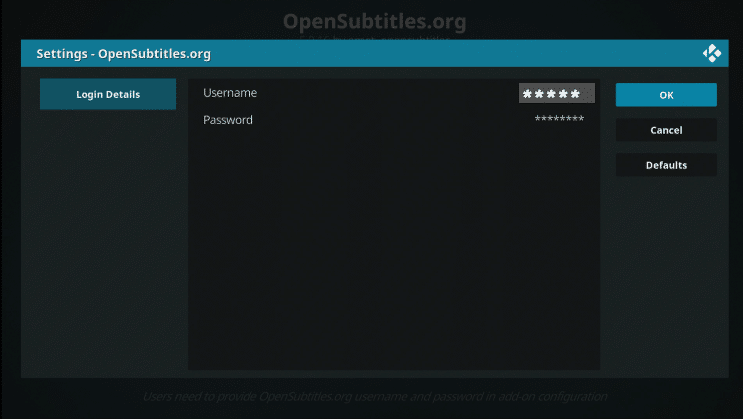
Step 11: In the dialog box, enter the username and password you created in step 1

Step 12: Go back to Kodi home screen and open ‘settings.’

Step 13: Open ‘Player’
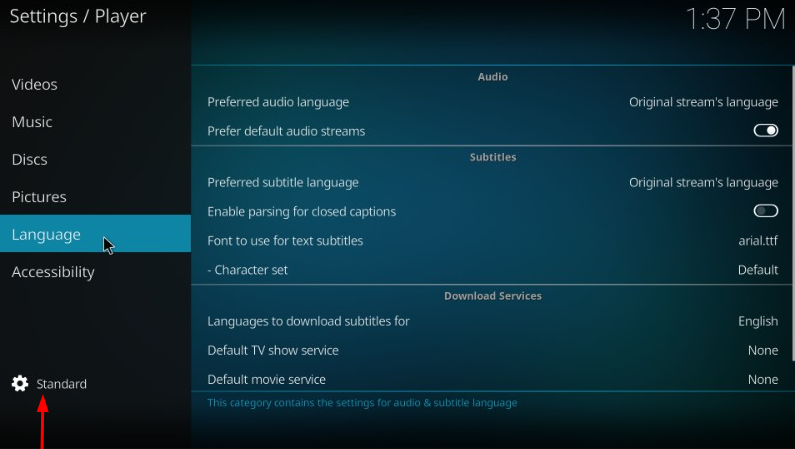
Step 14: Go to the bottom left of the screen to the cog icon and make sure that ‘Standard’ is selected.
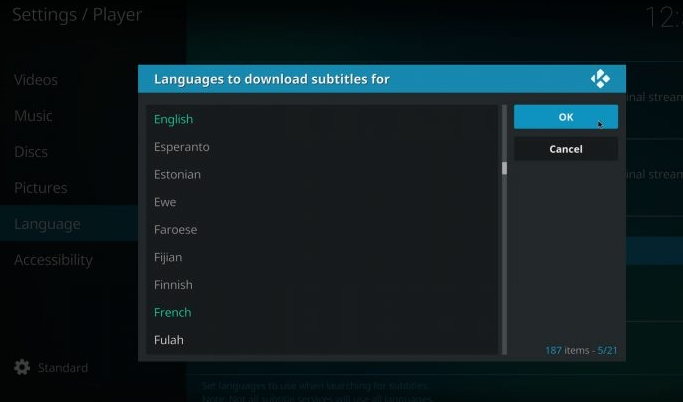
Step 15: Go to ‘language’ from the left sidebar choose ‘Languages to download subtitles for’ in ‘Download Services’ from the right. For most users, the default language would be set to English. You can choose multiple languages from the list.
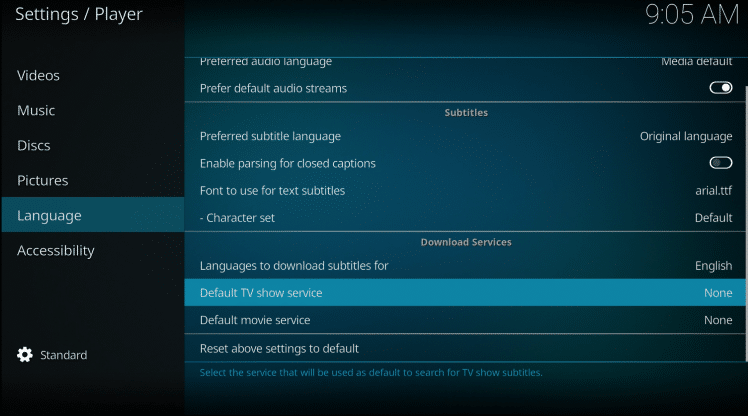
Step 16: Click ‘default TV show service’ to set up subtitles for TV shows

Step 16: Choose ‘OpenSubtitles.org’
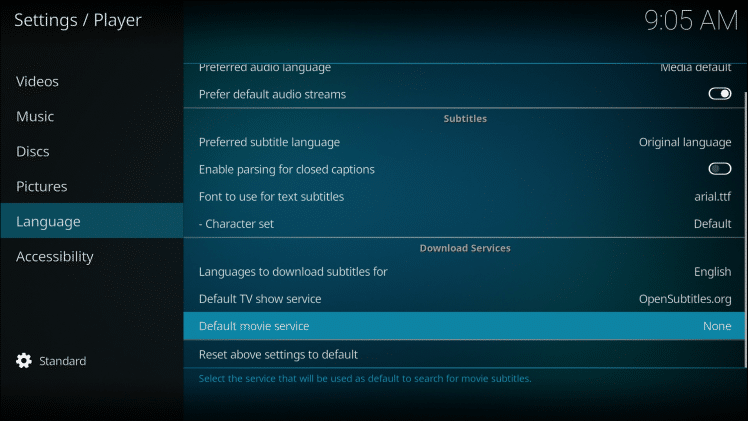
Step 17: Click on ‘default movie service’ and then repeat step 16
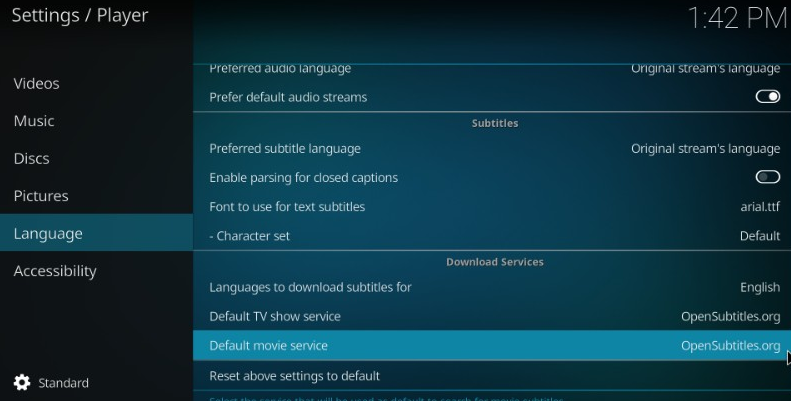
This is how your screen would look like once the OpenSubtitles has been set up on Kodi device. You may now play your favorite movie or TV show. Simply click on the subtitles icon on the bottom right of the screen and OpenSubtitles will automatically fetch the subtitles for the content being played.
How to Add Subtitles in Kodi using Subscene
While OpenSubtitles is the best subtitle service available for Kodi right now, it’s lengthy setup may get frustrating for some. For users who are looking for a quick fix may opt for Subscene. It may not offer as many Kodi subtitles as OpenSubtitles , but it can serve the purpose quite fairly for the most part. The best part is that it can be set up directly with Kodi without registering an account. Here’s a quick and easy way you can add subtitles in Kodi using Subscene.
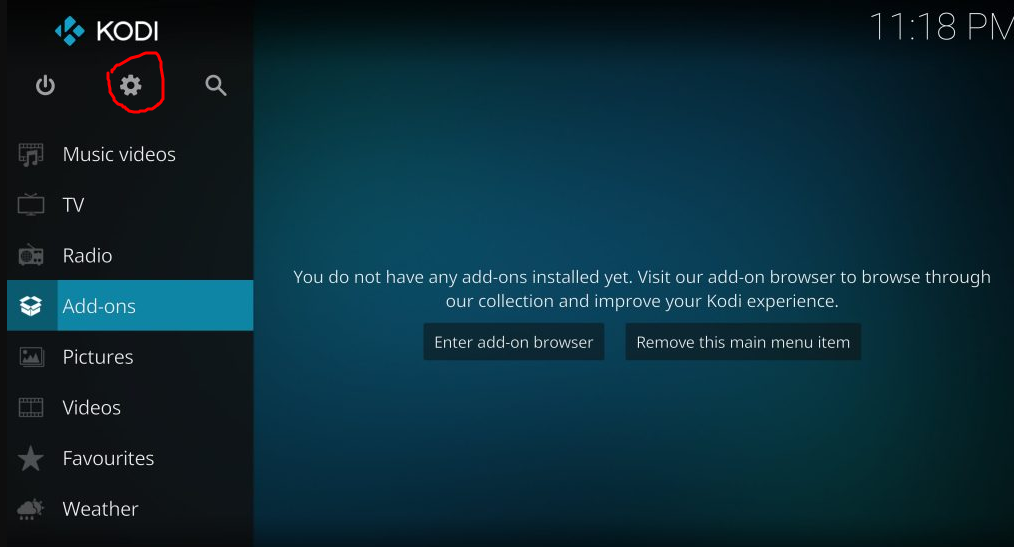
Step 1: Go to Kodi home screen and tap the ‘settings’ icon
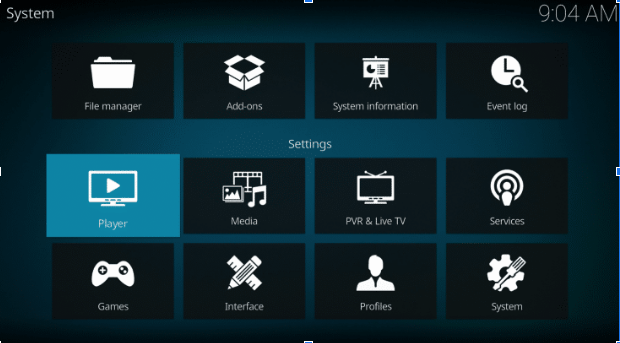
Step 2: Open ‘Player’
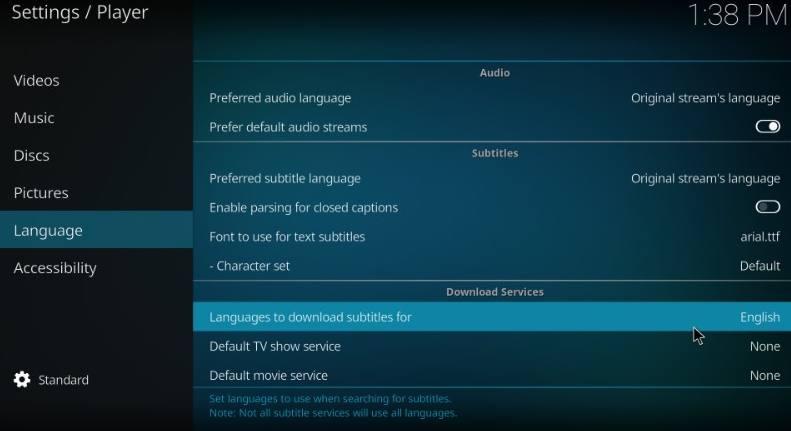
Step 3: Go to ‘language’ from the left sidebar then choose ‘Languages to download subtitles for’ in ‘Download Services.’The default language would be set to English, and if that’s your preferred language, leave this option be.
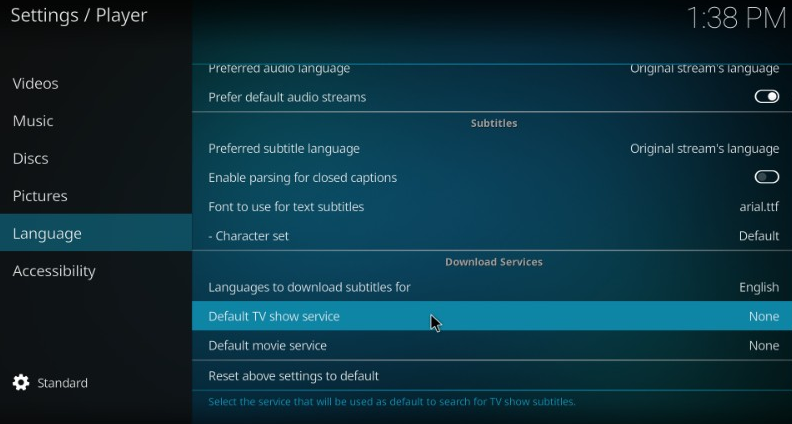
Step 4: Now choose ‘default TV show service.’

Step 5: Click on ‘Get more’ option and download subscene.com subtitle for Kodi (if you haven’t already).
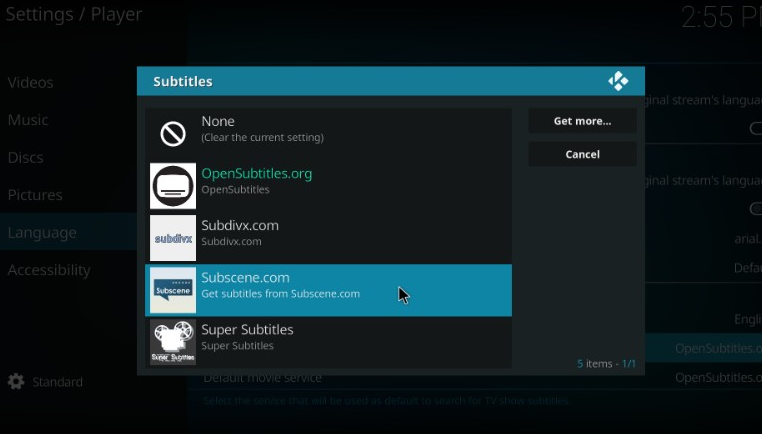
Step 6: Once you have it, click on ‘subscene.com’ for making it the default subtitle service for Kodi

Step 7: Now choose ‘default movie service’ and repeat the above step # 6. Now you’re all set, and Subscene will start looking for the subtitles by default once a title is played. Please note that you can use Opensubtitles as well even if you choose Subscene as the default subtitle service for your Kodi device. You can always choose between both or any other subtitle service that you may have installed to find subtitles for the content being played.