How to Install Kodi on Apple TV
Getting bored during the lockdown? Learn how to install Kodi on Apple TV and use a VPN on your device to get more addons. PureVPN is great at unlocking Kodi addons.
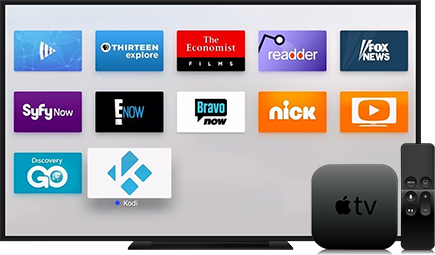
Table of Contents
- What is Apple TV
- What is Kodi
- How to Install Kodi on Apple TV Generation 1
- How to Install Kodi on Apple TV Generation 2
- How to Install Kodi on Apple TV Generation 4th, 5th Generation and 4K
What is Apple TV
Apple TV is a digital media player developed by Apple inc. that has been very popular in the streaming community for the better part of a decade. Using apps from the Apple store, Apple TV offers a plethora of movies and other entertainment channels. Moreover, you just need a steady internet connection to turn it into the ultimate internet streaming device.
What is Kodi
Kodi is a digital media player but unlike the Apple TV device, it is a software that comes in the form of apps for most devices and operating systems. With the advent of hundreds of add-ons, it lets you stream all types of media content including movies, TV shows, live TV, live sports and more. These add-ons are super easy to install and let you stream content from all around the world at your fingertips
How to Install Kodi on Apple TV Generation 1
The first generation was discontinued by Apple back in 2010 and three versions of the device have been released since then. But for those who are still using Apple TV 1 and want to use Kodi on the device, there’s an easy way to do so.
Apple TV 1 comes with a built-in hard having capacity upto 160GB which makes it easier to store different media files directly on your Apple TV device. The installation is very simple and al you need is a handy USB drive having 1GB or higher free space.
Disclaimer: Apple TV Generation 1 requires you to flush Kodi so you’ll lose all existing features.
Installation Process
- Upgrade your Apple TV 1 iOS version to 3.0.2 if you’re still using the previous version
- Download the OSMC (Open Source Media Center) installer by clicking here Once the installation completes, open OSMC.
- Once the installation completes, open OSMC. Note: You’ll receive a warning message since OSMC isn’t an officially licensed app store download.
- Plug the USB into your computer, choose ‘Apple TV’ from OSMC’s menu, and hit enter.
- Choose the latest OSMC version that includes ‘USB’ and hit enter
- On the next screen, a list of download options will appear. Choose the ‘SD card’ option and hit enter
- Now, choose your USB-DISK location, check the user agreement box and OSMC will start downloading on your USB device
- Once the installation is completed, take out the USB drive from your computer and plug it into Apple TV
- Boot your Apple TV and OSMC will start installing automatically
- Now you can use Kodi on your Apple TV Generation 1 device
How to Install Kodi on Apple TV Generation 2
The generation 2 Apple TV is probably easiest version to work with Kodi. Please note that the newer Kodi versions do not support Apple TV 2 so you may opt for an older version like Kodi Helix.
Installation Process
- Connect your Mac to your Apple TV generation 2 device using a USB-C cable
- Open your Mac’s terminal and enter this code ssh root@192.168.3.4. Note: Replace the IP address ‘192.168.3.4’ with your Apple TV IP address
- Enter your Mac’s password when prompted
- Now enter the below command prompts on Mac terminal
apt-get install wget wget -0- http://apt.awkwardtv.org/awkwardtv.pub | apt-key add – echo ?deb http://apt.awkwardtv.org/ stable main? > /etc/apt/sources.list.d/awkwardtv.list echo ?eb http://mirrors.kodi.tv/apt/atv2 ./? > /etc/apt/sources.list.d/xbmc.list apt-get update apt-get install org.xbmc.kodi-atv2
How to Install Kodi on Apple TV Generation 4th, 5th Generation and 4K
You may have noticed that we have skipped Apple TV Generation 3 but only because it is not compatible with Kodi. You can use Apple AirPlay to use Kodi on your Apple TV 3 from another Apple device but is it really worth it? Apple TV 3 is very hard to configure thus the majority of users resort to another version of the device to use with Kodi.
There are 3 different ways to install Kodi on Apple TV 4 & 5 and Apple TV 4K. Before we describe each of them in detail, let’s list down the official requirements for the setup.
- Apple TV (4th or 5th generation – Apple TV 4K)
- tvOS version 11 or higher
- The latest Kodi version for iOS – DEB File (ARM64)
- Cydia Impactor for the method that includes Cydia Impactor
- Xcode and iOS App Signer for the method that includes Xcode
We have outlined 2 separate methods for Apple TV 4 & 5 that come with a USB port and one method for Apple TV 4K that doesn’t have a USB port.
Method 1: How to Install Kodi using Cydia Impactor
In order to install Kodi using Cydia Impactor, first you need convert Kodi’s DEB file into IPA file.
- Make sure that you have a running app that unzips files. Mac users can use an app like Unarchiver or Entropy and Windows users can use 7-Zip of PeaZip. Use any of these apps to unzip Kodi’s DEB file
- Now unzip the file named ‘data.tar’
- Open the folder named ‘data’, move to the applications folder and another folder named ‘Kodi.app’ will appear
- Create a new folder next to ‘Kodi.app’. Here we name it ‘XYZ’
- Drag and drop the ‘Kodi.app’ folder into the ‘XYZ’ folder you created
- Now create a new zip file. Windows users may right click on the ‘XYZ’ folder and choose the unzip app they have installed. Mac users may have to put in a little effort but they can use this guide to do so.
- Windows users must choose ZIP as the archive format and name the file as ‘Kodi.ipa’. Mac users will get the zip file directly and only have to rename it as ‘Kodi.ipa’
Now that we have created an IPA file, let’s get down to the installation method without further ado.
- Connect your Apple TV device to your computer and close iTunes if it opens automatically
- Open Cydia Impactor
- Now drag and drop ‘Kodi.ipa’ file
- Enter your Apple ID
- Cydia Impactor will install the Kodi app on your Apple TV device
- Disconnect Apple TV from your computer
- Connect your Apple TV device to your TV and start using Kodi
Method 2: How to Install Kodi using Xcode
Here’s how you can install Kodi on Apple TV 4 & 5 using Xcode. Please note that Xcode is available for Mac users only.
- Connect your Apple TV to your Mac using the USB-C or USB-A cable
- Launch the latest version of Xcode and click on “Create a new Xcode project” from the main menu
- From the left sidebar, choose ‘tvOS’, then ‘Application’
- Now choose ‘Single View Application’ from the right
- Now specify options for the app. Give the app a product name and organization name and fill the Bundle Identifier. Once you’ve filled all the fields, click ‘next’
- Once Xcode loads you may see an error saying that the software can’t find a “matching provisioning profile”. Simply click on ‘Fix Issue’ to resolve this problem
- Now you will be required to enter your Apple ID. Having a developer ID is a plus but you may also go with your regular Apple ID. Choose your Apple ID from the drop down box and click ‘choose’ to proceed. Xcode will now fix the error and you’ll be redirected to the home view
- Now open the iOS App Signer. You’ll be required to fill out multiple fields. In the first field named ‘Input File’, navigate to your Kodi DEB file. You can use default values for fields like ‘Signing Certificate’ and ‘Provisioning Profile’
- Look for the ‘App Display Name’ field at the bottom. Type ‘Kodi’ and click ‘Start’
- Now the App Signer will unpack the data and create a new IPA file in a little while
- Go to Xcode. Click on ‘Windows’, then choose ‘Device’
- Select your Apple TV device from the list appearing on the left and choose the ‘+’ tab under ‘Installed Apps’
- Navigate to the newly created IPA file created within iOS Signer and open it
- You can disconnect Apple TV once the process has finished. Connect Apple TV to your TV and you shall see Kodi running
Method 3: How to Install Kodi on Apple TV 4K Wirelessly
The process to install Kodi on Apple TV 4K is similar to Apple TV 4th and 5th generation using Xcode. However, you have to establish a wireless connection since Apple TV 4K doesn’t come with a USB slot. Here’s how you can do it.
- Open your Apple TV 4K device and go to ‘Settings’,then ‘Remotes and Devices’, and then ‘Remote App and Devices’
- Open Xcode on your Mac and go to ‘Windows’, then ‘Devices and Simulators’ from the menu bar
- You’ll be taken to a new window. If your Mac and your Apple TV 4K device have been placed close, a button will appear to pair both devices with each other. Click on the button that says ‘Pair With (Your Name) Apple TV’
- You will receive a verification code on your Apple TV display. Type code that into Xcode to finish setup
- Once the setup finishes, Xocde and your Apple TV 4K will be paired