What is Port Forwarding?
Port forwarding allows external devices to access services on a private network. By directing incoming traffic from a specific port on your router to a device within your local network, it enables you to host servers, play multiplayer games, and more.
Do You Need to Port Forward Destiny 2?
When you port forward Destiny 2, it improves connection stability, reduces lag, and avoids NAT issues, making it easier to join matches and fireteams. Opening the required ports allows direct communication with Bungie’s servers and other players for smoother multiplayer gameplay.
Information Required for Destiny 2 Port Forwarding
To set up port forwarding for Destiny 2, you will need to know the following details:
1. The router’s local IP address.
2. The PC or console’s local IP address.
3. The TCP and UDP ports Destiny 2 uses.
How to Set Up Destiny 2 Port Forwarding
Here is a step-by-step guide to port forward Destiny 2:
Step #1: Open Ports on Your Router
1. Open a web browser and enter your router’s IP address to log in.
2. Go to the Port Forwarding section.
3. Enter your PC or console’s IP address in the required field.
4. Add Destiny 2’s required TCP and UDP ports.
5. Save the changes and restart your router.
Step #2: Adjust Firewall Settings (For PC)
1. Open your PC’s firewall settings.
2. Create inbound and outbound rules for TCP and UDP ports you forwarded earlier.
3. Add Destiny 2’s executable file to the firewall’s allowed list.
4. Save the rules and close the firewall settings.
Step #3: Test if Ports are Open
1. Use any port checking tool like portchecker.co to verify if the ports are open.
2. Launch Destiny 2 and join a multiplayer match to check if connectivity has improved.
Ports Needed to Run Destiny 2
Ports to Forward on Steam
Ports to Forward on PC
Ports to Forward on PS4 & PS5
Ports to Forward on Xbox One & Series X
PureVPN’s Port Forwarding Add-On
Easy & Secured Way to Open All Ports
Want to open ports for Destiny 2 without effort? Using our Port Forwarding add-on, you can avoid manual configurations for good. In just a few clicks, you can open the required ports for Destiny 2 and enjoy stable connections, faster gameplay, and better matchmaking.
How to Port Forward Destiny 2 with PureVPN
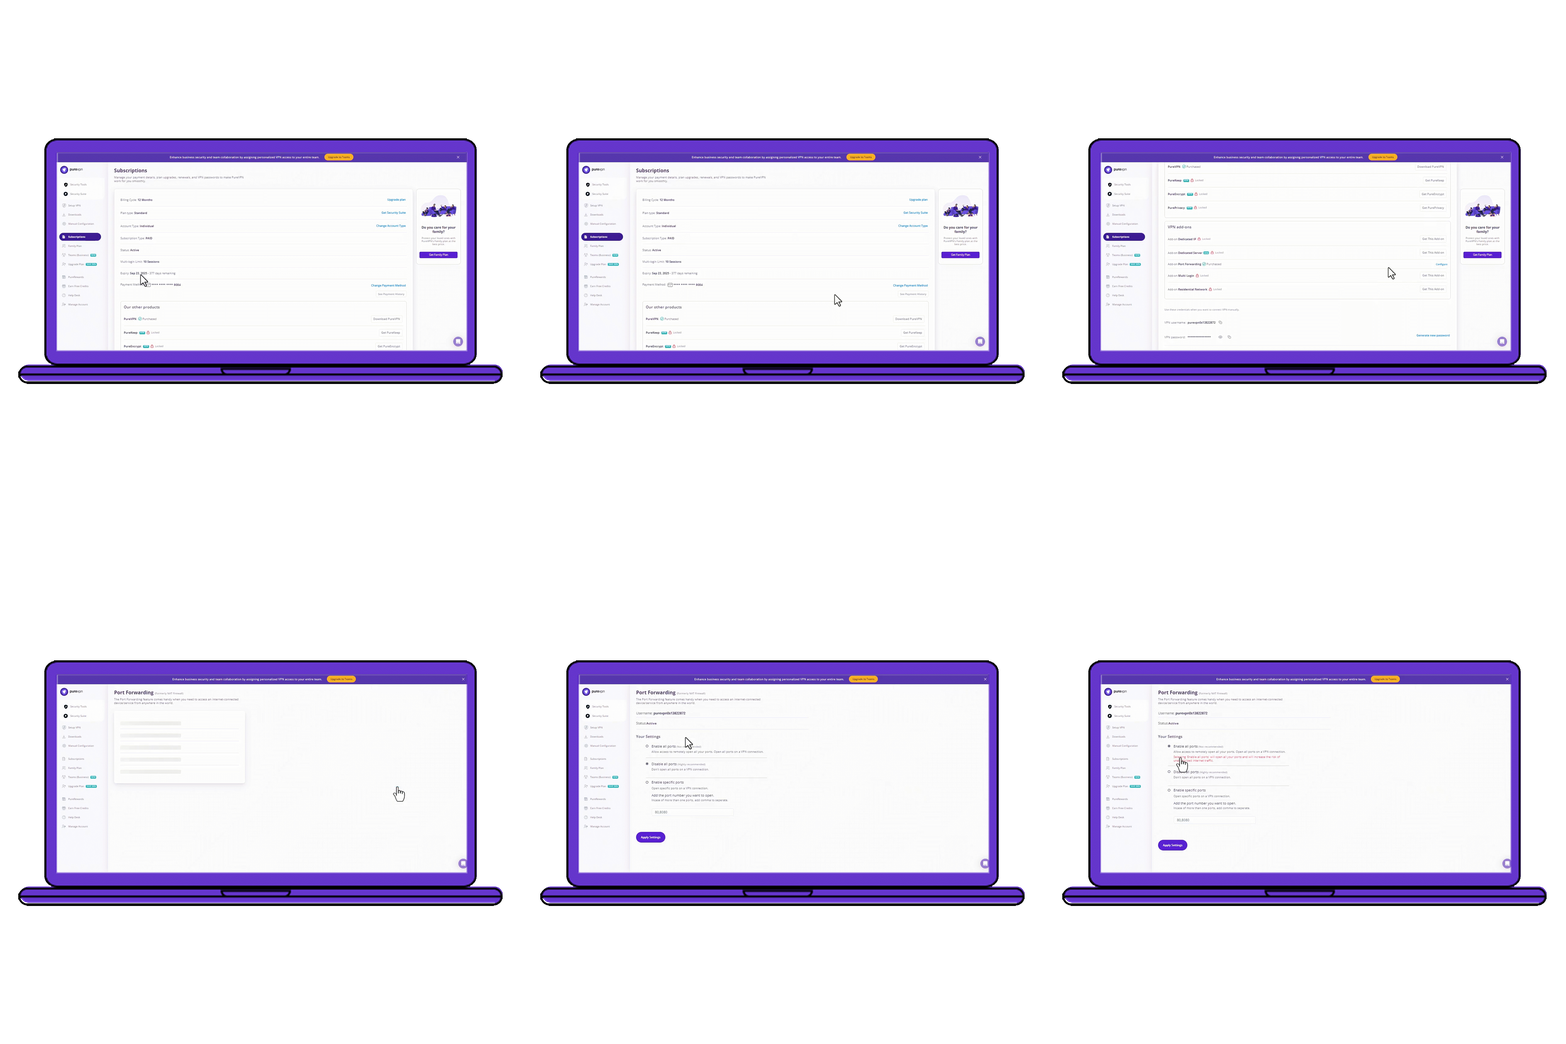
1. Sign up for PureVPN, add Port Forwarding to your plan, and complete the payment.
2. Download and install the PureVPN app, launch it, and log into your account.
3. Go to the PureVPN Member Area, open Subscriptions, and click Configure next to Port Forwarding.
4. Select Enable specific ports, enter the required ports for Destiny 2, and click Apply Settings.
5. Open PureVPN, connect to a port forwarding-supported server, and start playing Destiny 2 with improved connectivity!

Benefits of Using the Port Forwarding Add-On
PureVPN’s Port Forwarding add-on can help you in dozens of ways. Here are some top ways you can make the most of the add-on:
- Get around Carrier-grade NAT issues.
- Enjoy faster gaming and downloading.
- Open ports on any device without hassle.
- Port forward with the protection of a VPN.
Frequently Asked Questions
What ports should I forward for Destiny 2?
If you are playing via Steam, you will have to open TCP 27015-27030, 27036-27037 and UDP 3074, 3097, 4380, 27000-27031, 27036. For other platforms, check out the table above.
Do I need to port forward Destiny 2?
Yes, port forwarding Destiny 2 improves your gaming experience by reducing lag, increasing connection stability, and improving matchmaking times.
Why is Destiny 2 port forwarding not working?
Destiny 2 port forwarding may not work due to closed firewall ports, double NAT issues, or ISP restrictions. Use a static IP and check router settings to resolve the issue.

