How to Port Forward Monster Hunter: Rise
Monster Hunter: Rise is an action-RPG videogame for PC and consoles. In the game, players take on the role of a hunter who is sent to explore a new world teeming with fantastical creatures. As you hunt these creatures, you will gather resources that can be used to create powerful weapons and armor to help survive in the wilderness. Monster Hunter Rise features a variety of different environments, each with its own unique creatures and secrets to hunting. The game also promises exciting co-operative multiplayer gameplay, allowing players to team up with their friends to take down the deadliest of beasts alive.
Ports required to run Monster Hunter Rise
Following are the ports required to run Monster Hunter Rise:
Monster Hunter Rise – Steam
Monster Hunter Rise – Switch
How to enable Monster Hunter Rise Port Forwarding
When playing Monster Hunter Rise, one important thing to keep in mind is that the game can be quite challenging. If you want to make the most of this experience, you’ll want to make sure that you’re able to port forward the game. This will ensure that you have the best possible connection to the game server, and can enjoy lag-free gameplay, free from buzzkill-inducing disconnections.
Before you forward a port
Before you forward a port, you need to make sure of the following things to proceed:
- Your router’s IP address.
- The device’s IP address that you will play on. This could be either your computer or your gaming console.
- A list of TCP and UDP ports that need to be forwarded.
How to find your router’s IP address
There are a few ways to find your router’s IP address, but the easiest way is to look in your router’s manual, as the IP address will be listed there.
How to forward ports
The first way is to do it manually by logging in to your router and entering the port numbers you want to forward into the correct configuration fields. It can be tricky, so we recommend checking your router’s manual to make sure you’re doing it correctly. An easy way to do this is to use PureVPN’s Port Forwarding add-on.
However, the general process for forwarding a port is:
- Open the web browser and type your router’s IP address to access its setup page.
- Locate your router’s Port Forwarding section.
- Enter the IP address of your computer or gaming console in the correct fields.
- Enter the TCP and UDP ports for your game in the correct fields.
- Frequently, your router will require a reboot for the changes to take effect.
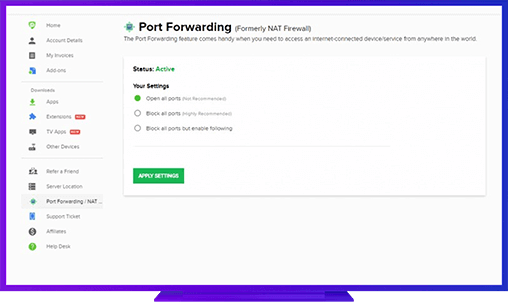
PureVPN’s Port Forwarding add-on
Easy and secure way to open ports.
Forwarding your ports for Monster Hunter Rise is more straightforward if you use the PureVPN Port Forwarding add-on. It can open and close your desired ports with just a few clicks. So, no matter what game you’re playing, give PureVPN’s Port Forwarding add-on a shot, and we bet you’ll love it!
Benefits of using PureVPN’s Port Forwarding add-on
Our Port Forwarding add-on will make forwarding your ports for Monster Hunter Rise easier. The add-on also offers some other advantages:
- It works on your phone, mobile, and other devices to forward your ports on any available devices.
- It will improve your downloading speed for torrents and on other P2P networks.
- It will even let you configure CGNAT (Carrier Grade Network Address Translation).
Further Port Forwarding Guides
- PC Gaming Port Forwading
- Players Unknown Battleground
- Fortnite
- Apex Legends
- Call Of Duty: Black Ops 4
- Battlefield V: Firestorm
- Minecraft
- Arma 3
- Destiny 2
- Fantasy Grounds
- Overwatch
- Warframe
- Steam
- For Honor
- Rocket League
- League of Legends
- Port Forwarding For Games
- Dead by Daylight
- Among Us
- Call of Duty: Black Ops II
- Call of Duty: Black Ops III
- Call of Duty: Warzone
- Dota 2
- ARK Survival Evolved
- Age of Empire 3
- Roblox
- Call of Duty: Black Ops 3
- eFootball PES 2020
- Terraria
- Counter-Strike: Global Offensive
- Call of Duty: Modern Warfare 3
- Diablo III